
This tutorial guides you through setting up an account status report in Muuktest.
Go to portal.muuktest.com:5000
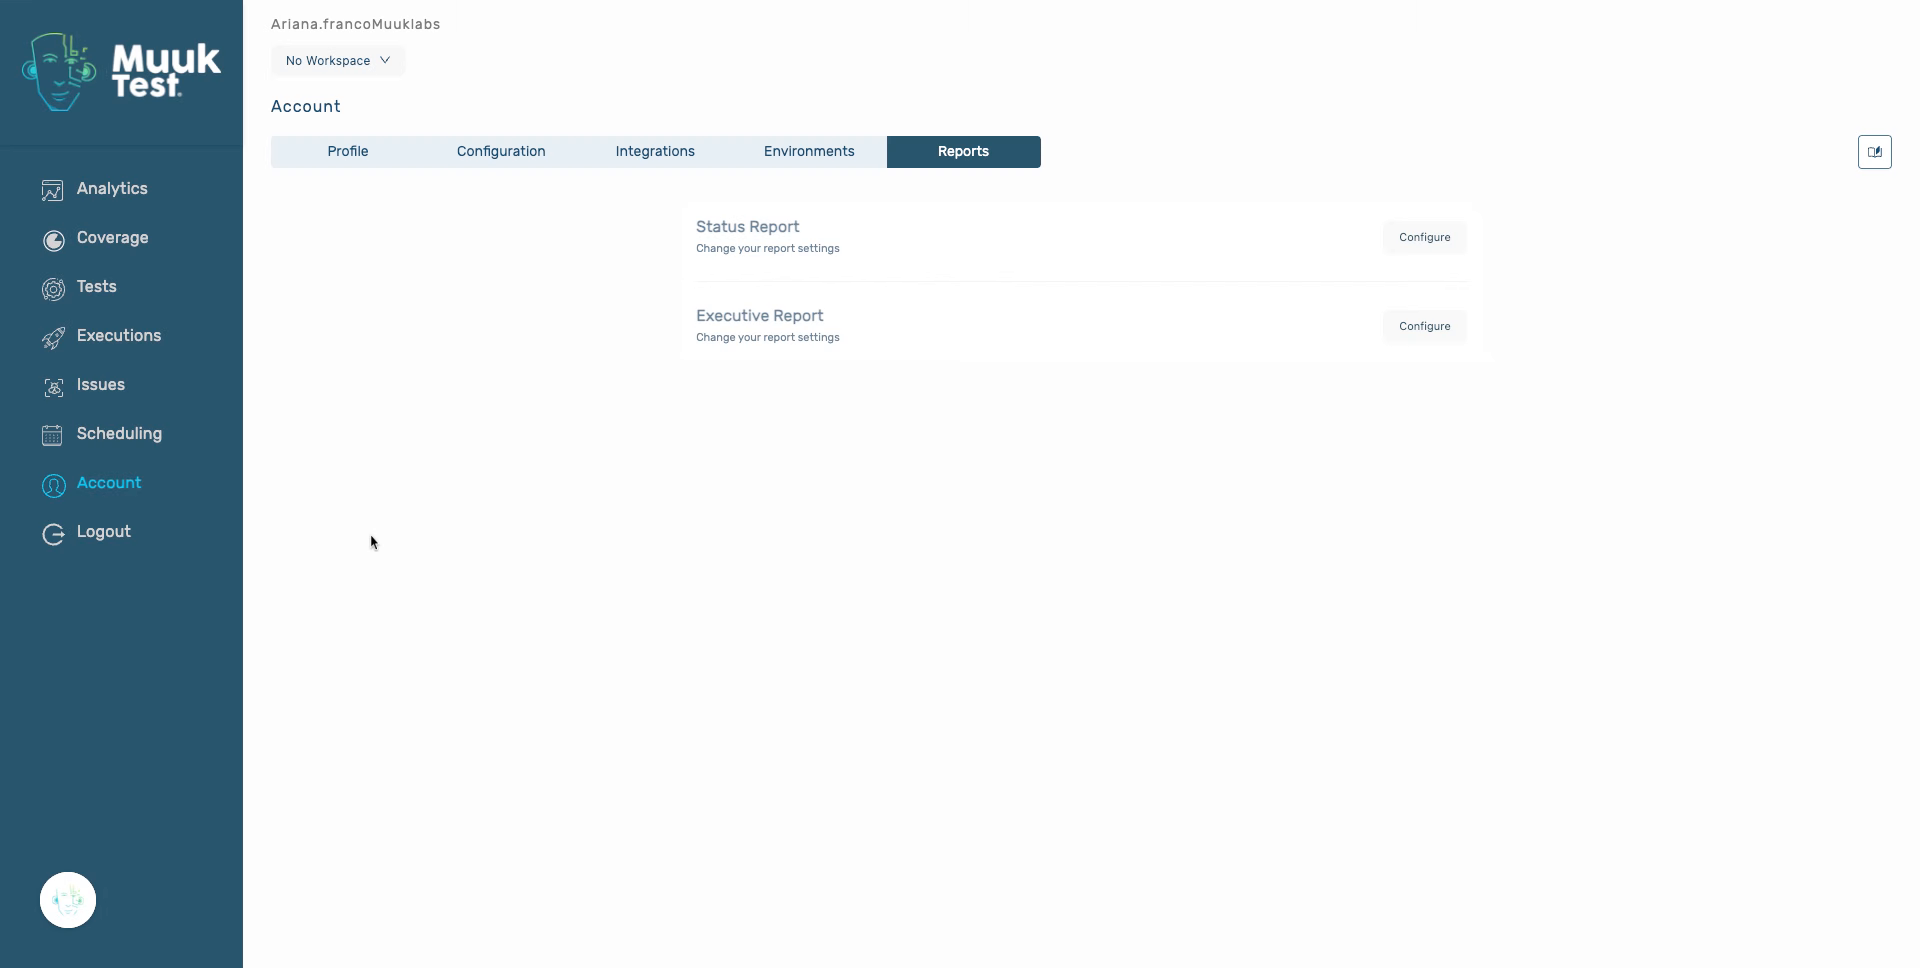
1. Introduction
You will learn how to configure report details, schedule delivery, and manage recipients effectively.
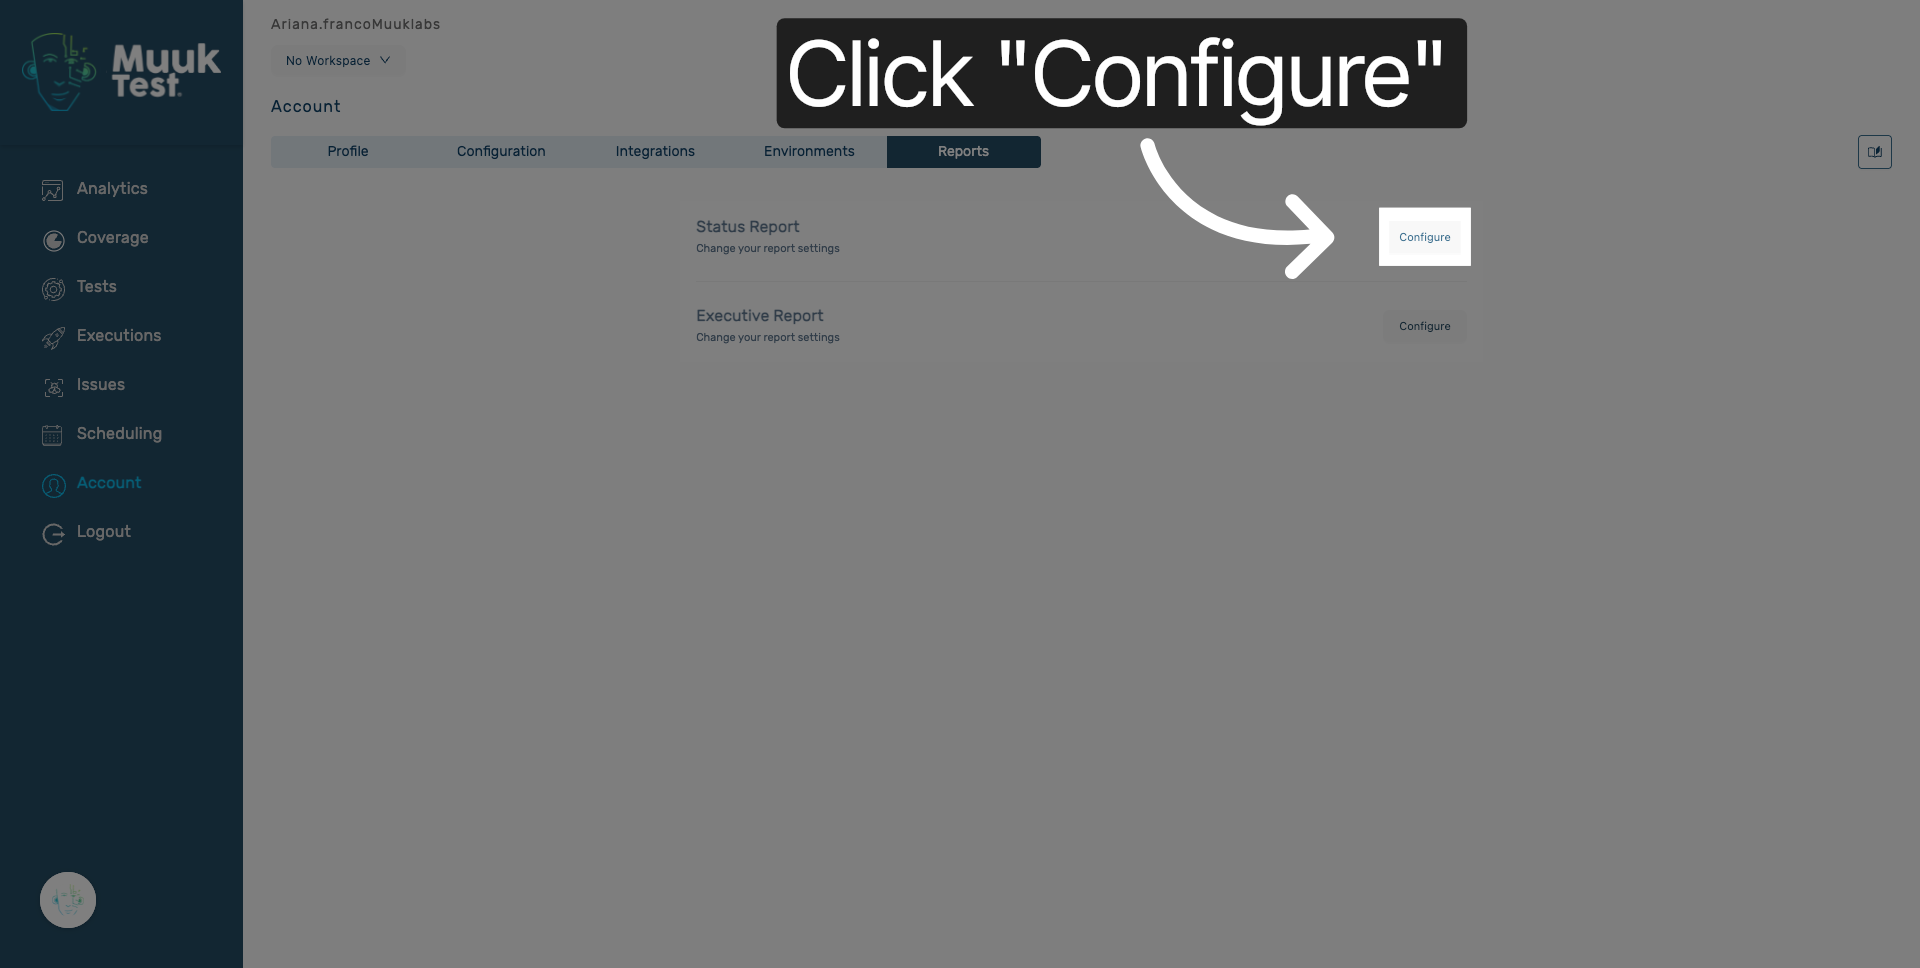
2. Click Configure Button
Click the Configure button to begin setting up your account status report.
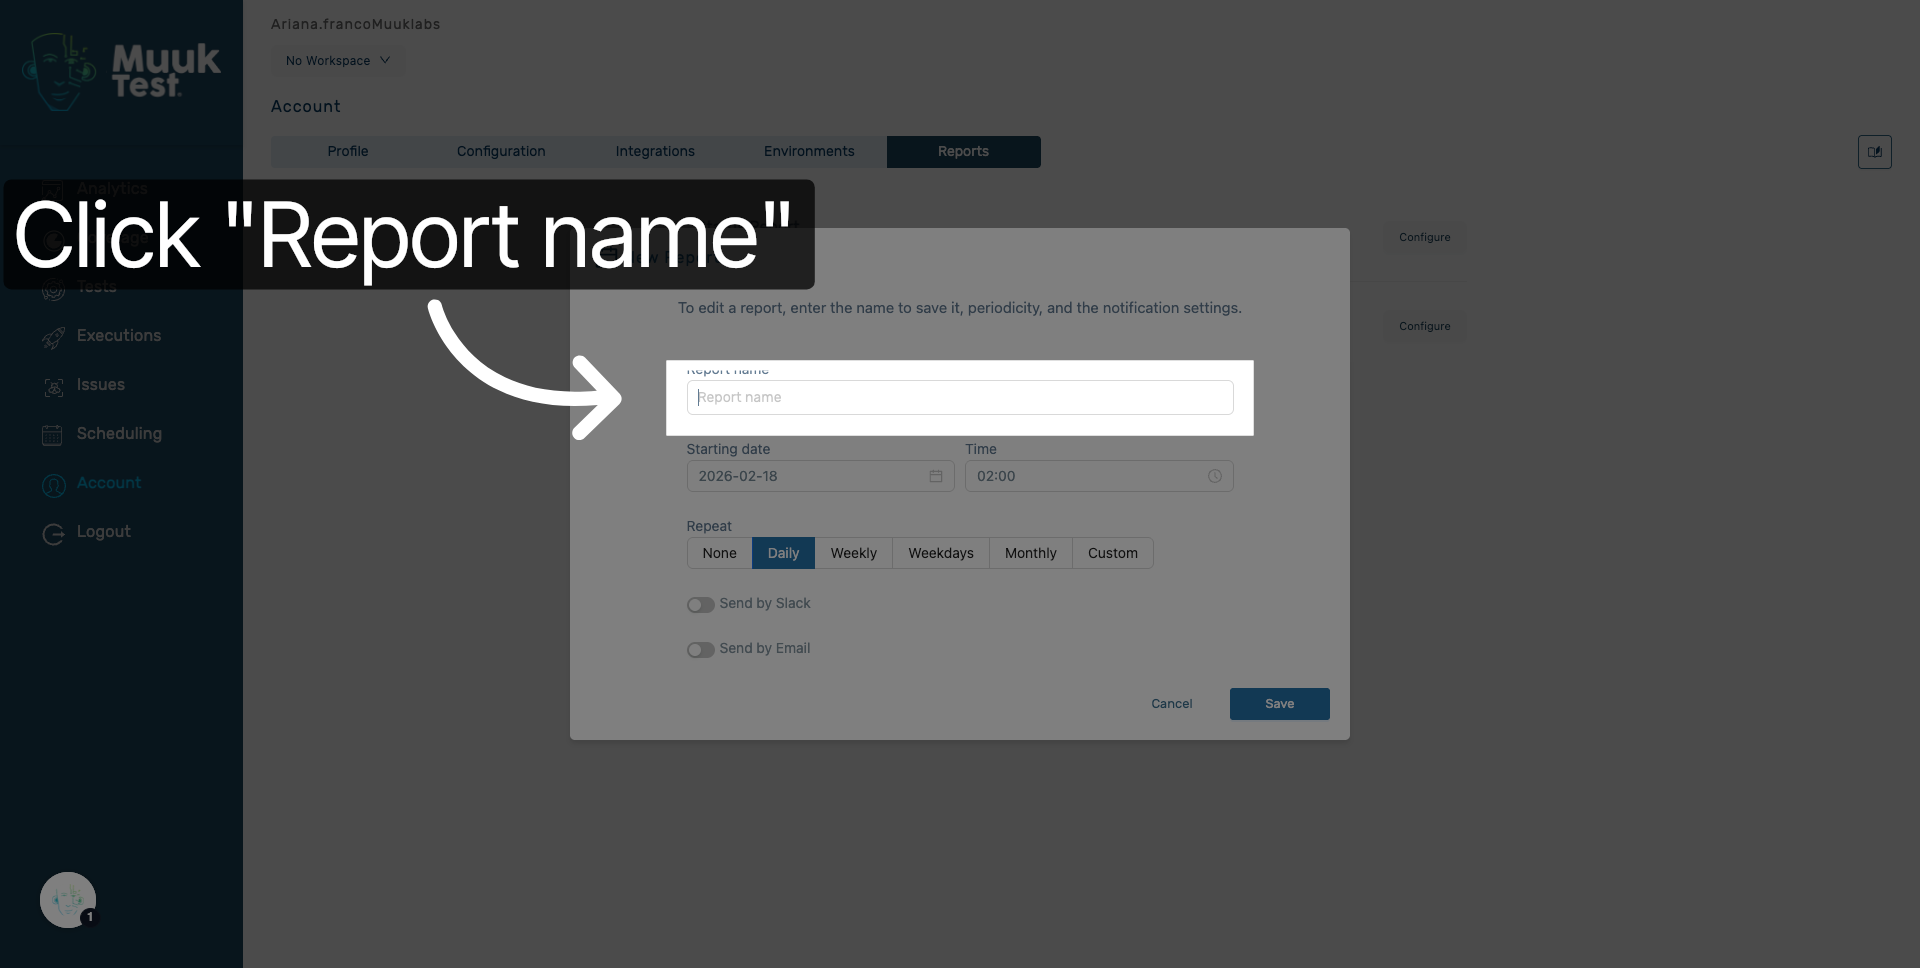
3. Select Report Name Field
Click the Report name field to specify the name of your report.
4. Enter Report Name
Enter your desired report name to identify the account status report.
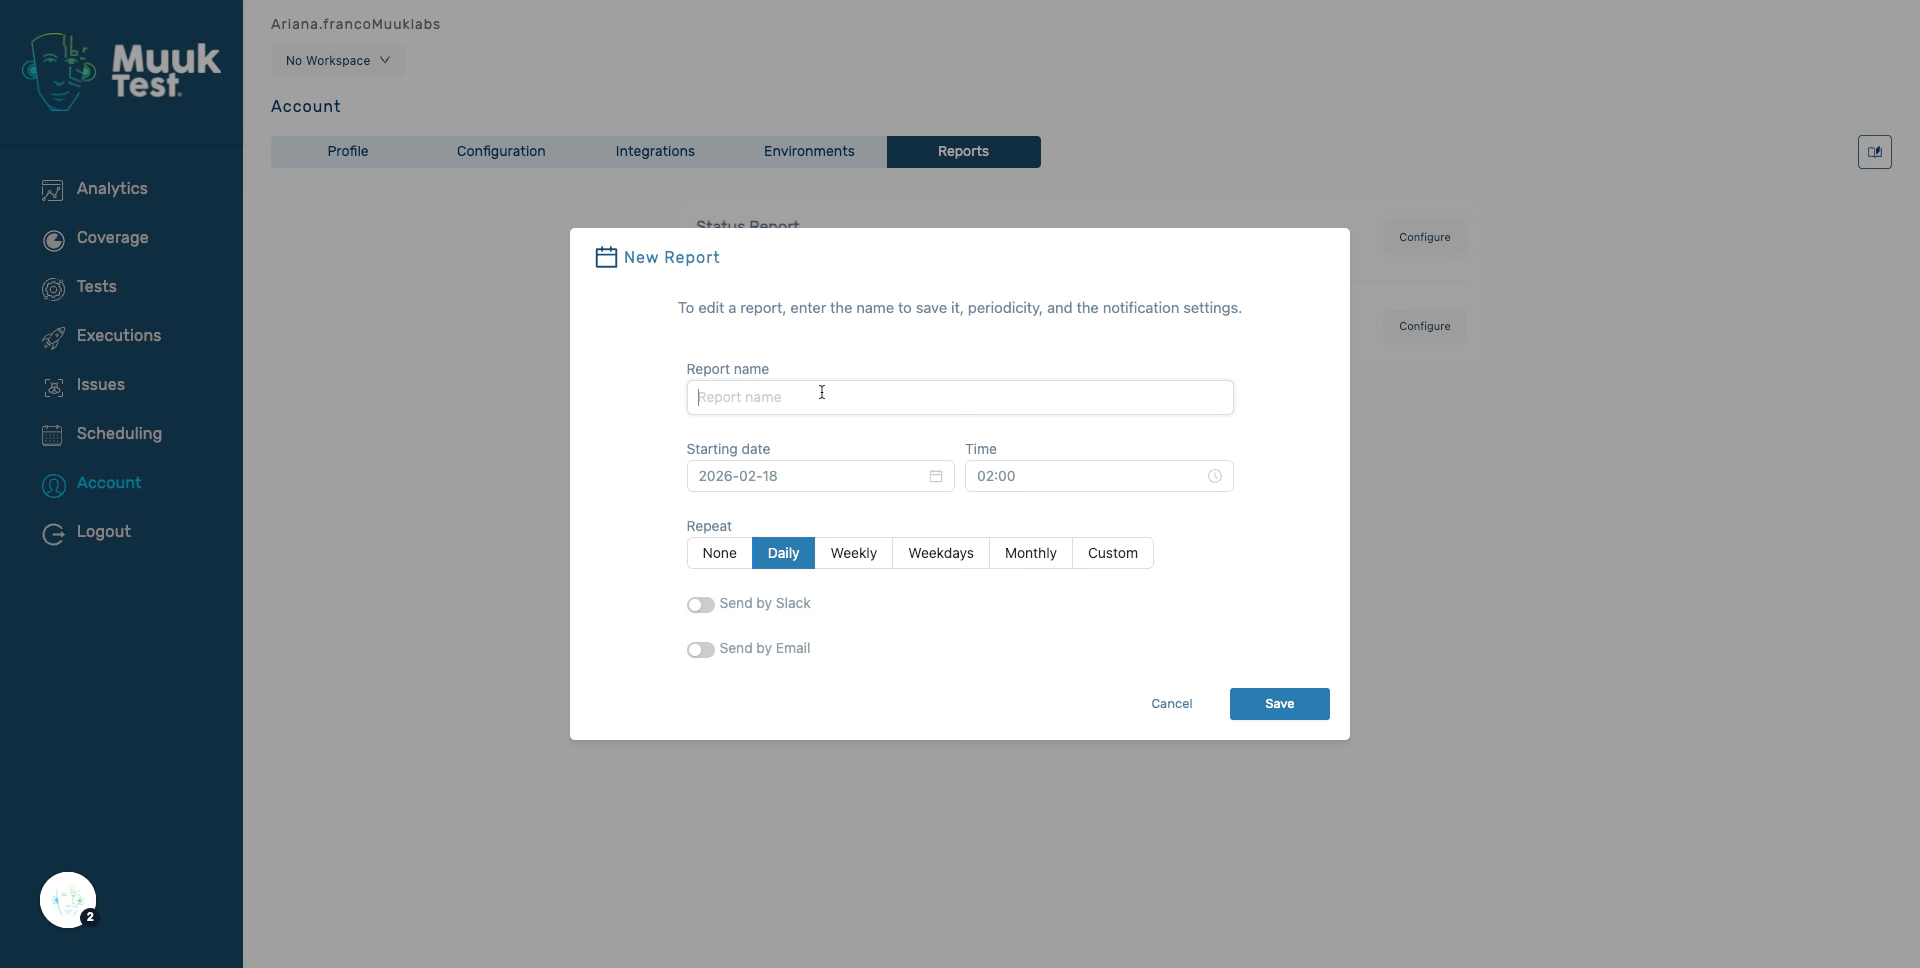
5. Open Date Picker
Click the date field to open the calendar for selecting the report date.
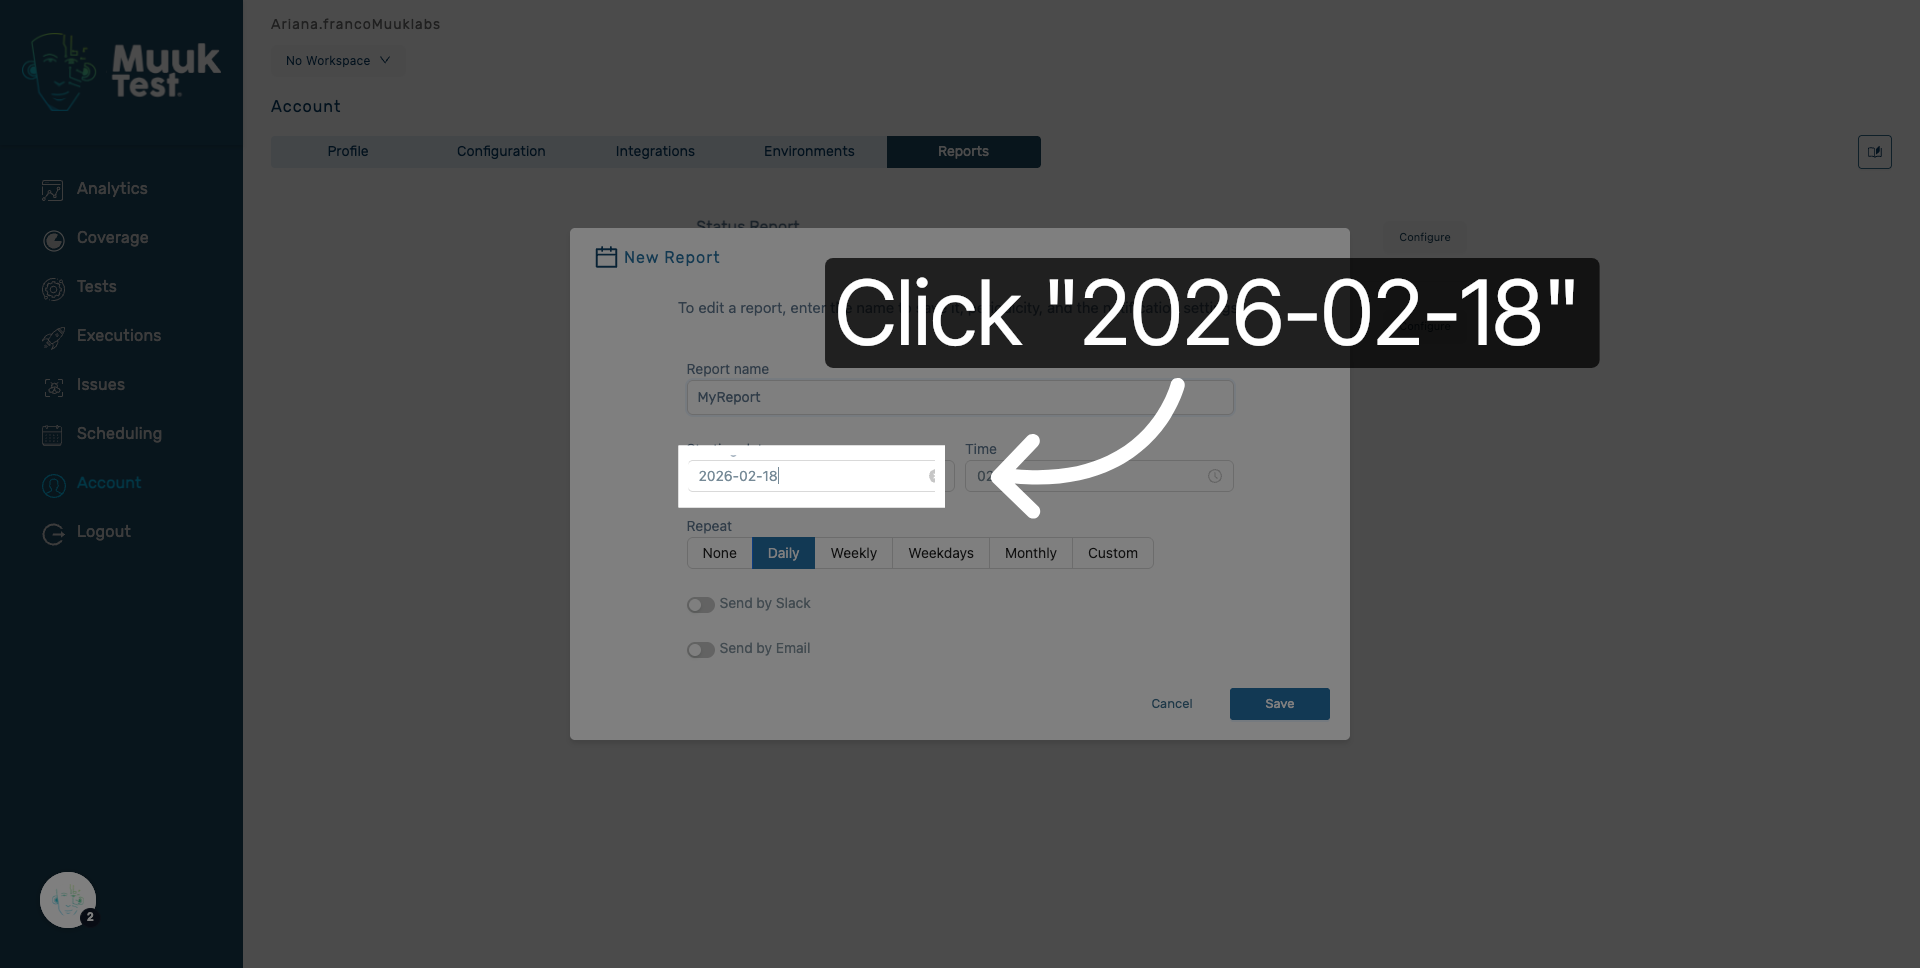
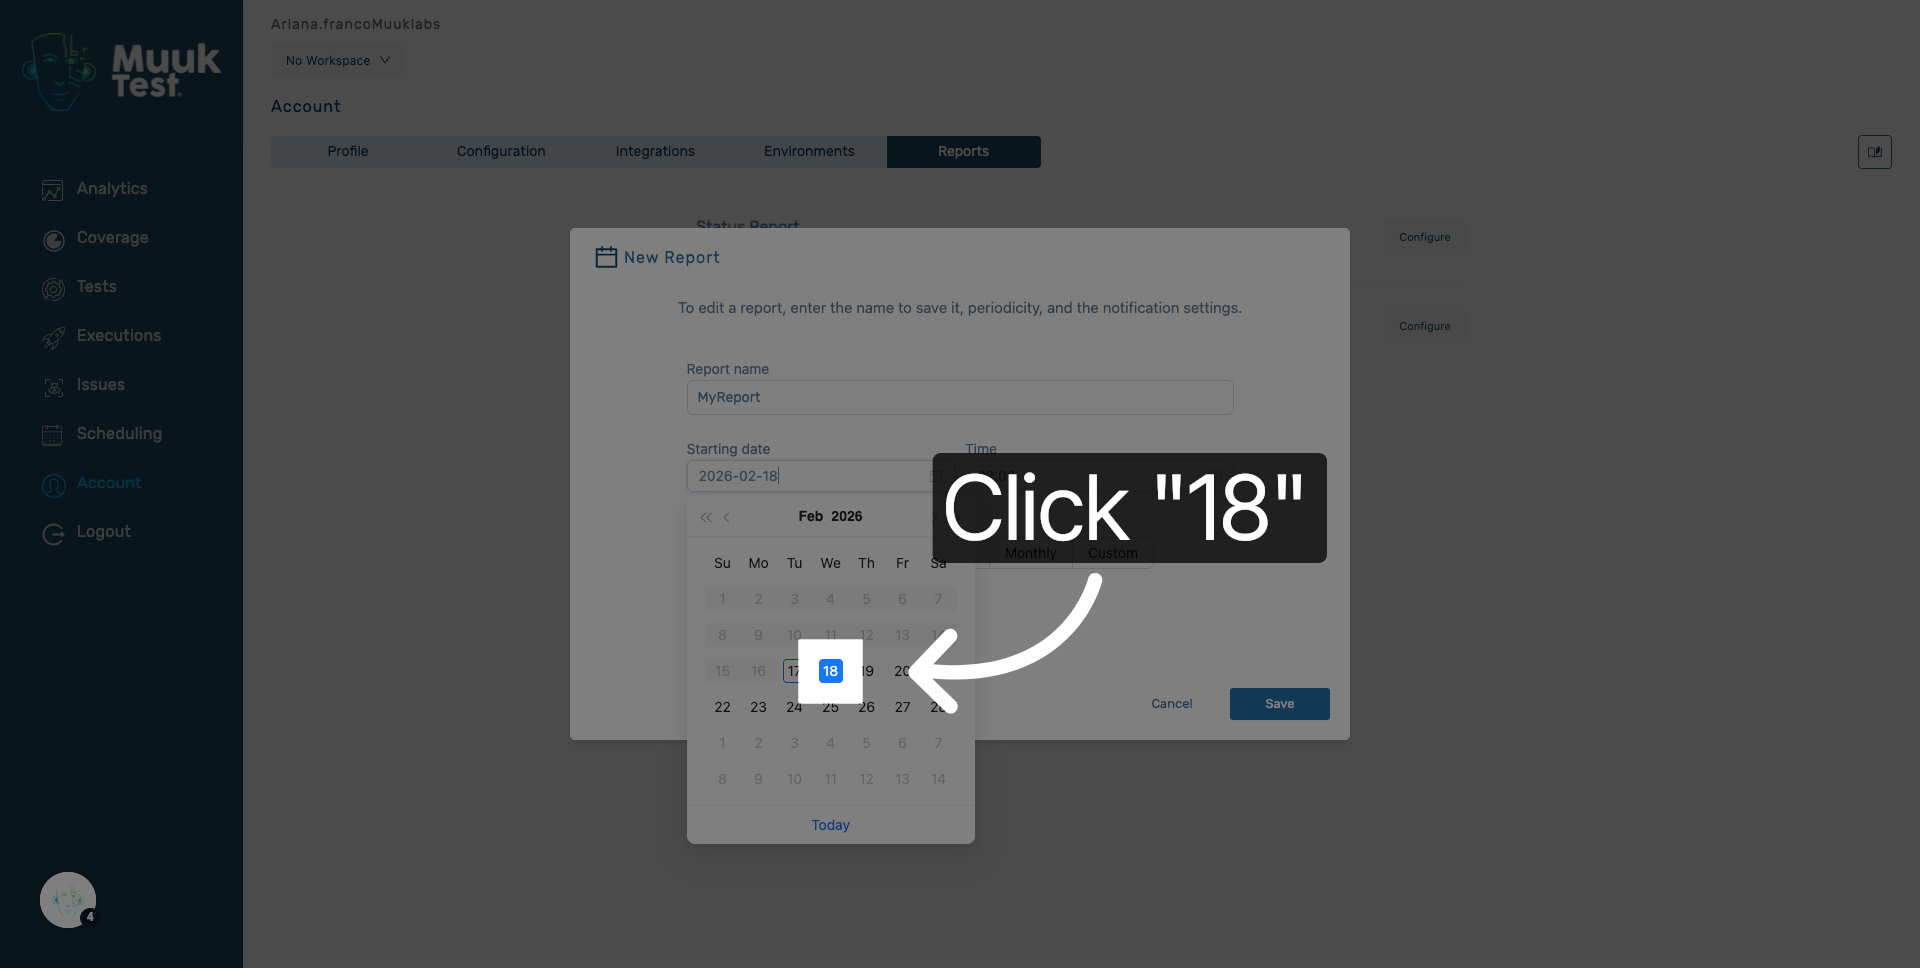
6. Choose Report Date
Select the specific day for the report to be generated.
7. Select Report Time
Click the time field to set the exact time for the report generation.
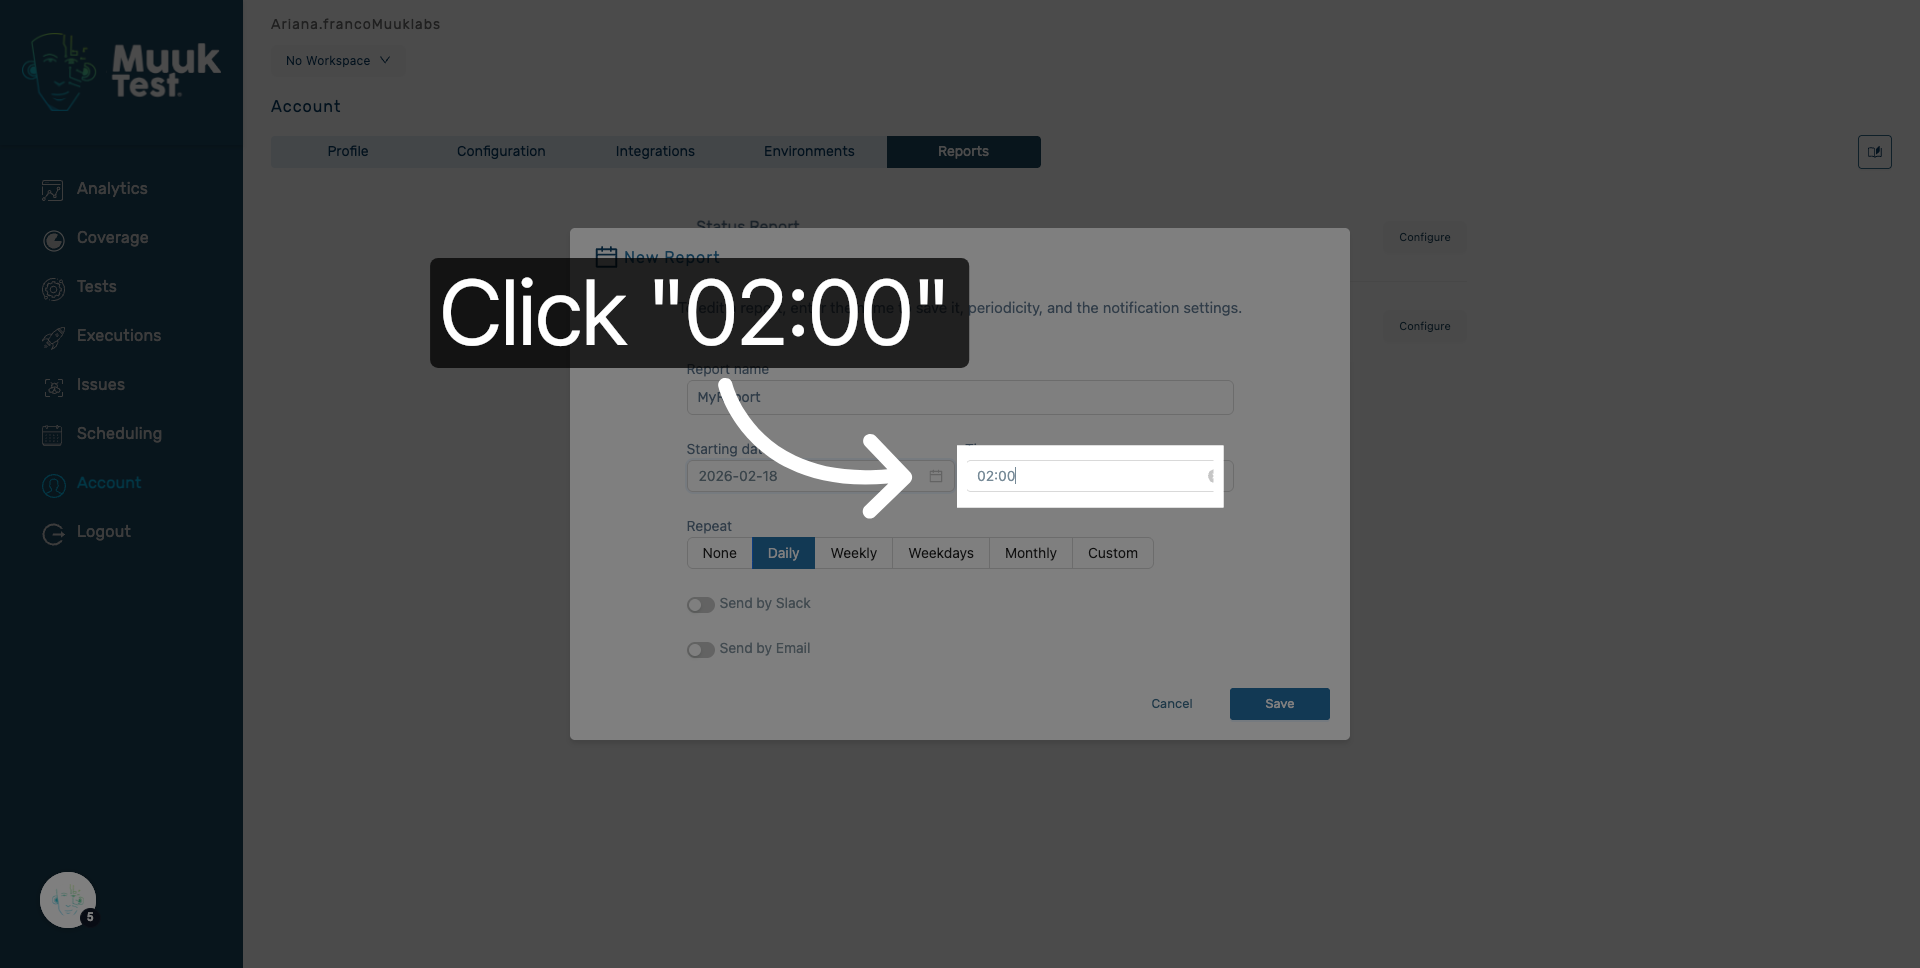
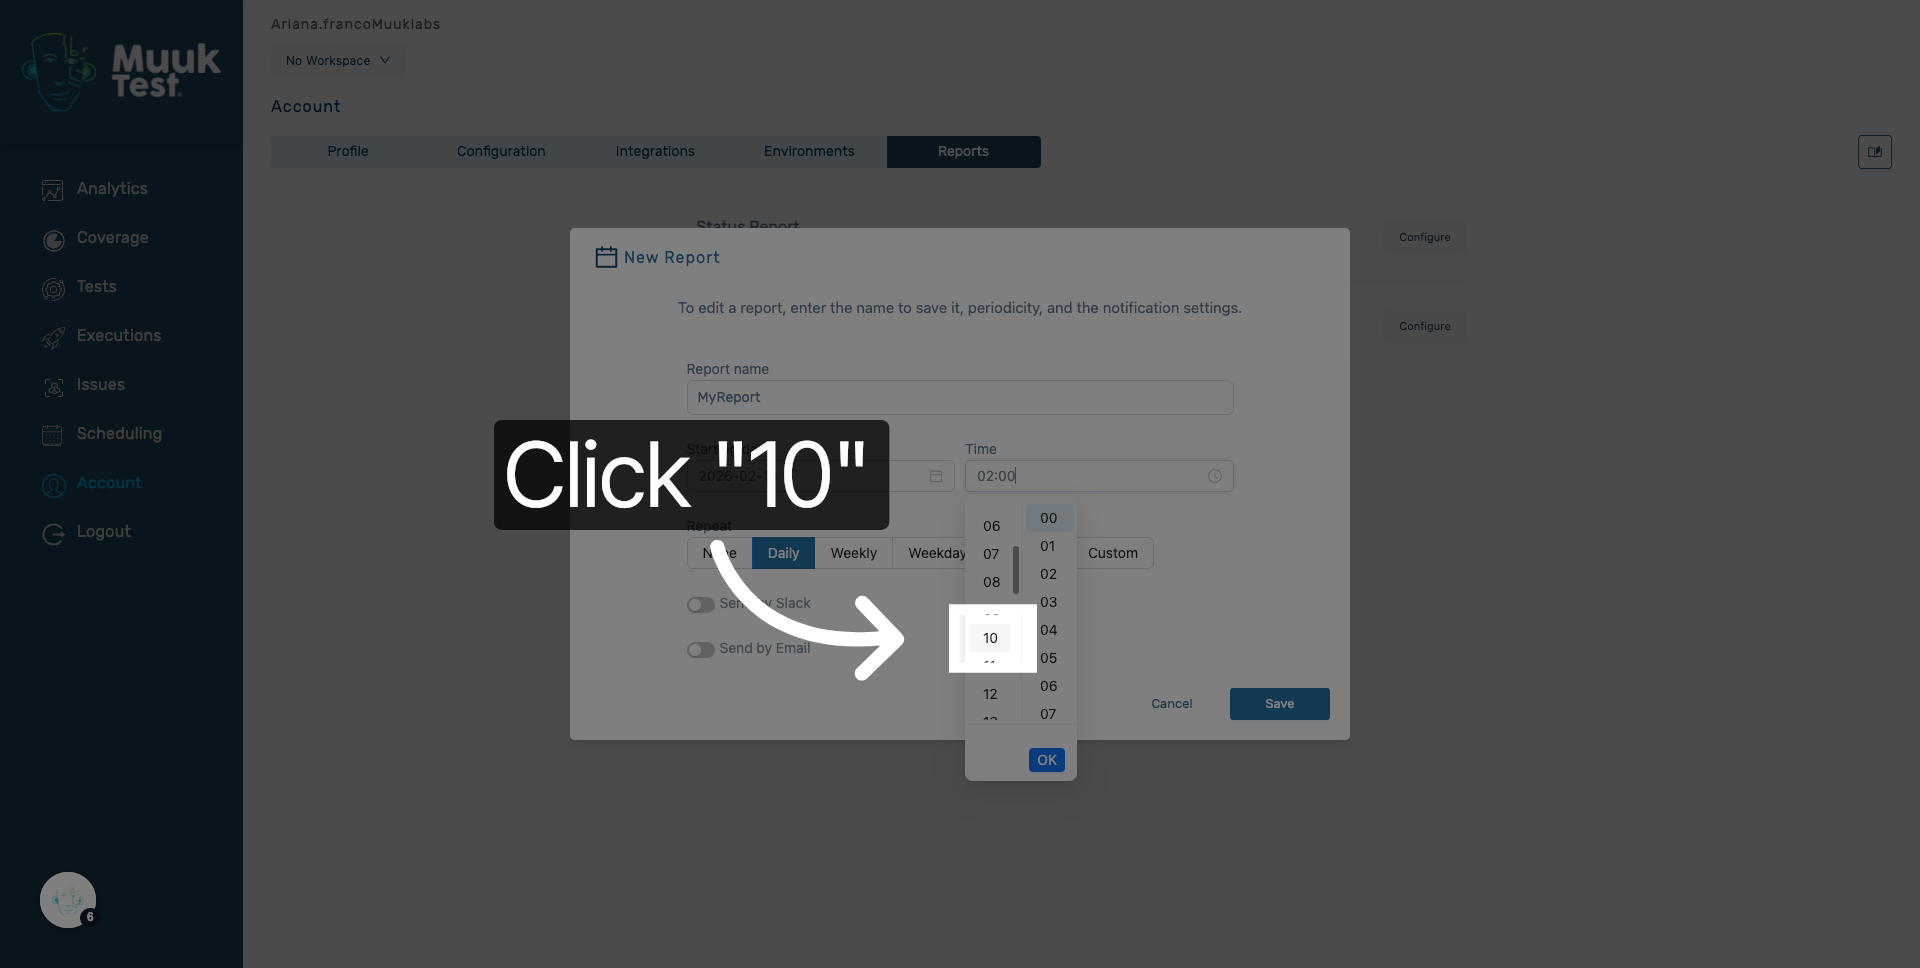
8. Set Report Hour
Choose the hour when the report should be created and sent.
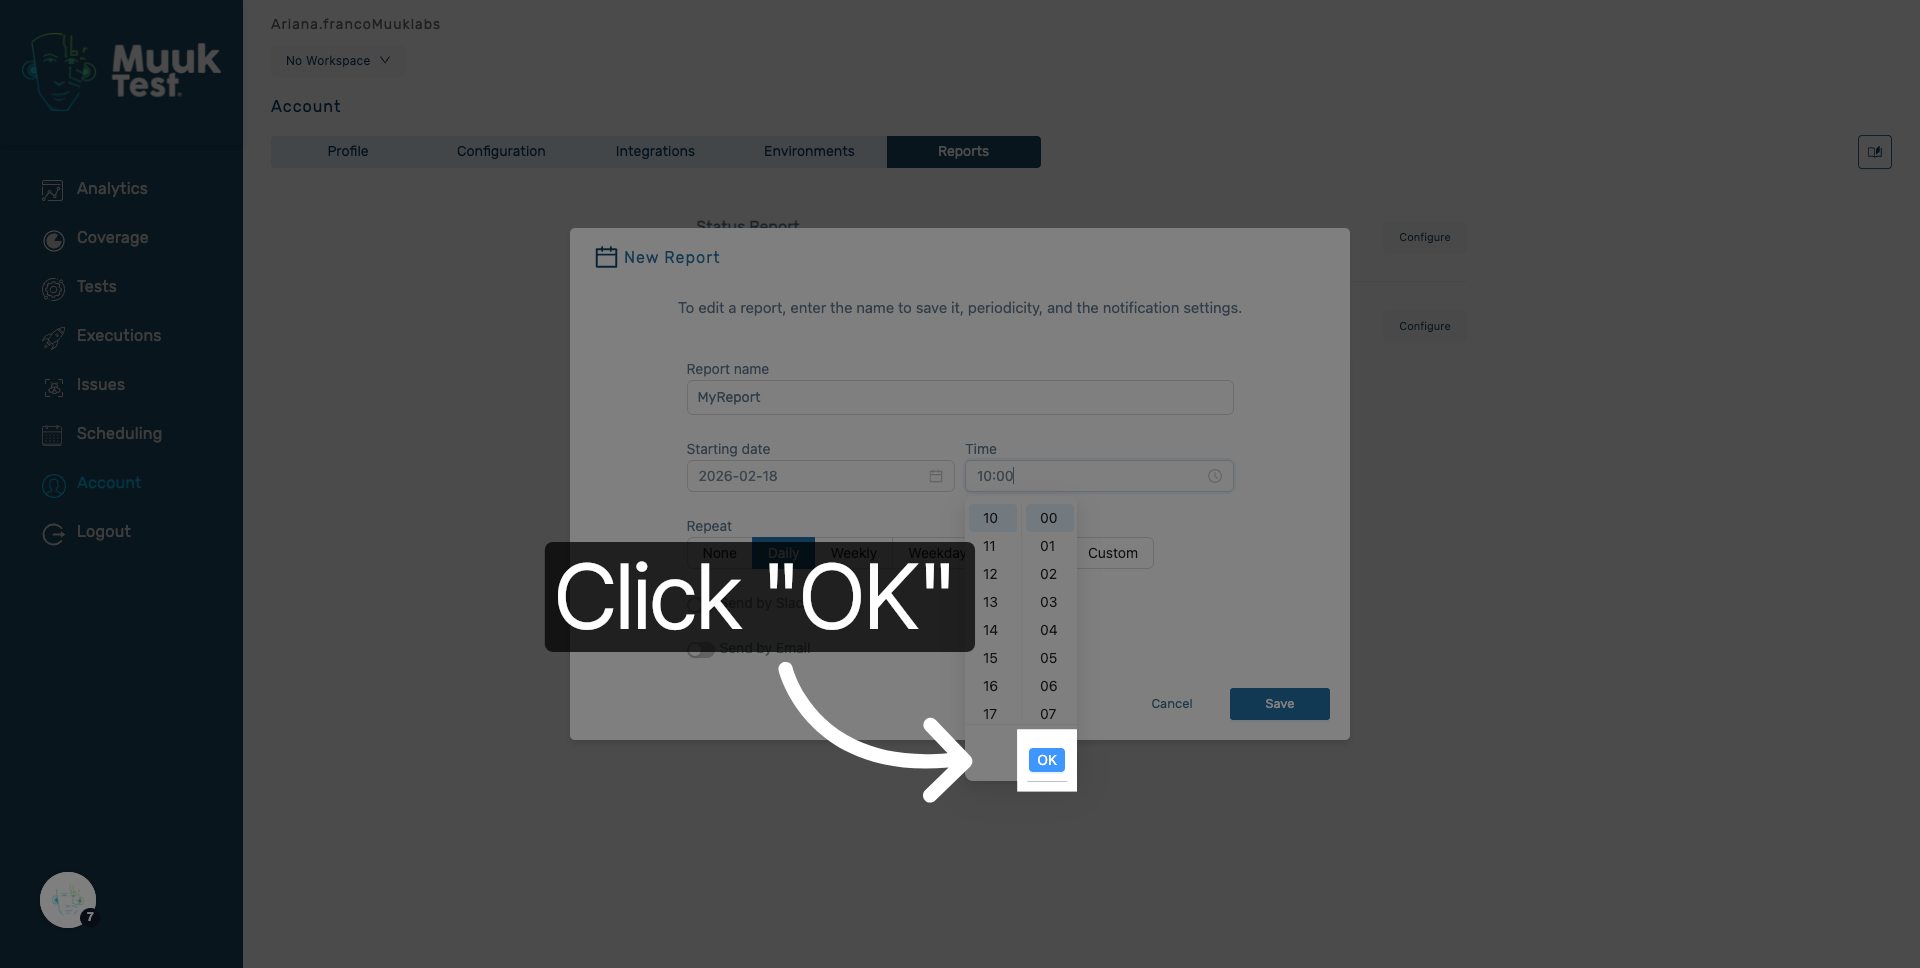
9. Confirm Date and Time
Click OK to confirm the selected date and time for the report schedule.
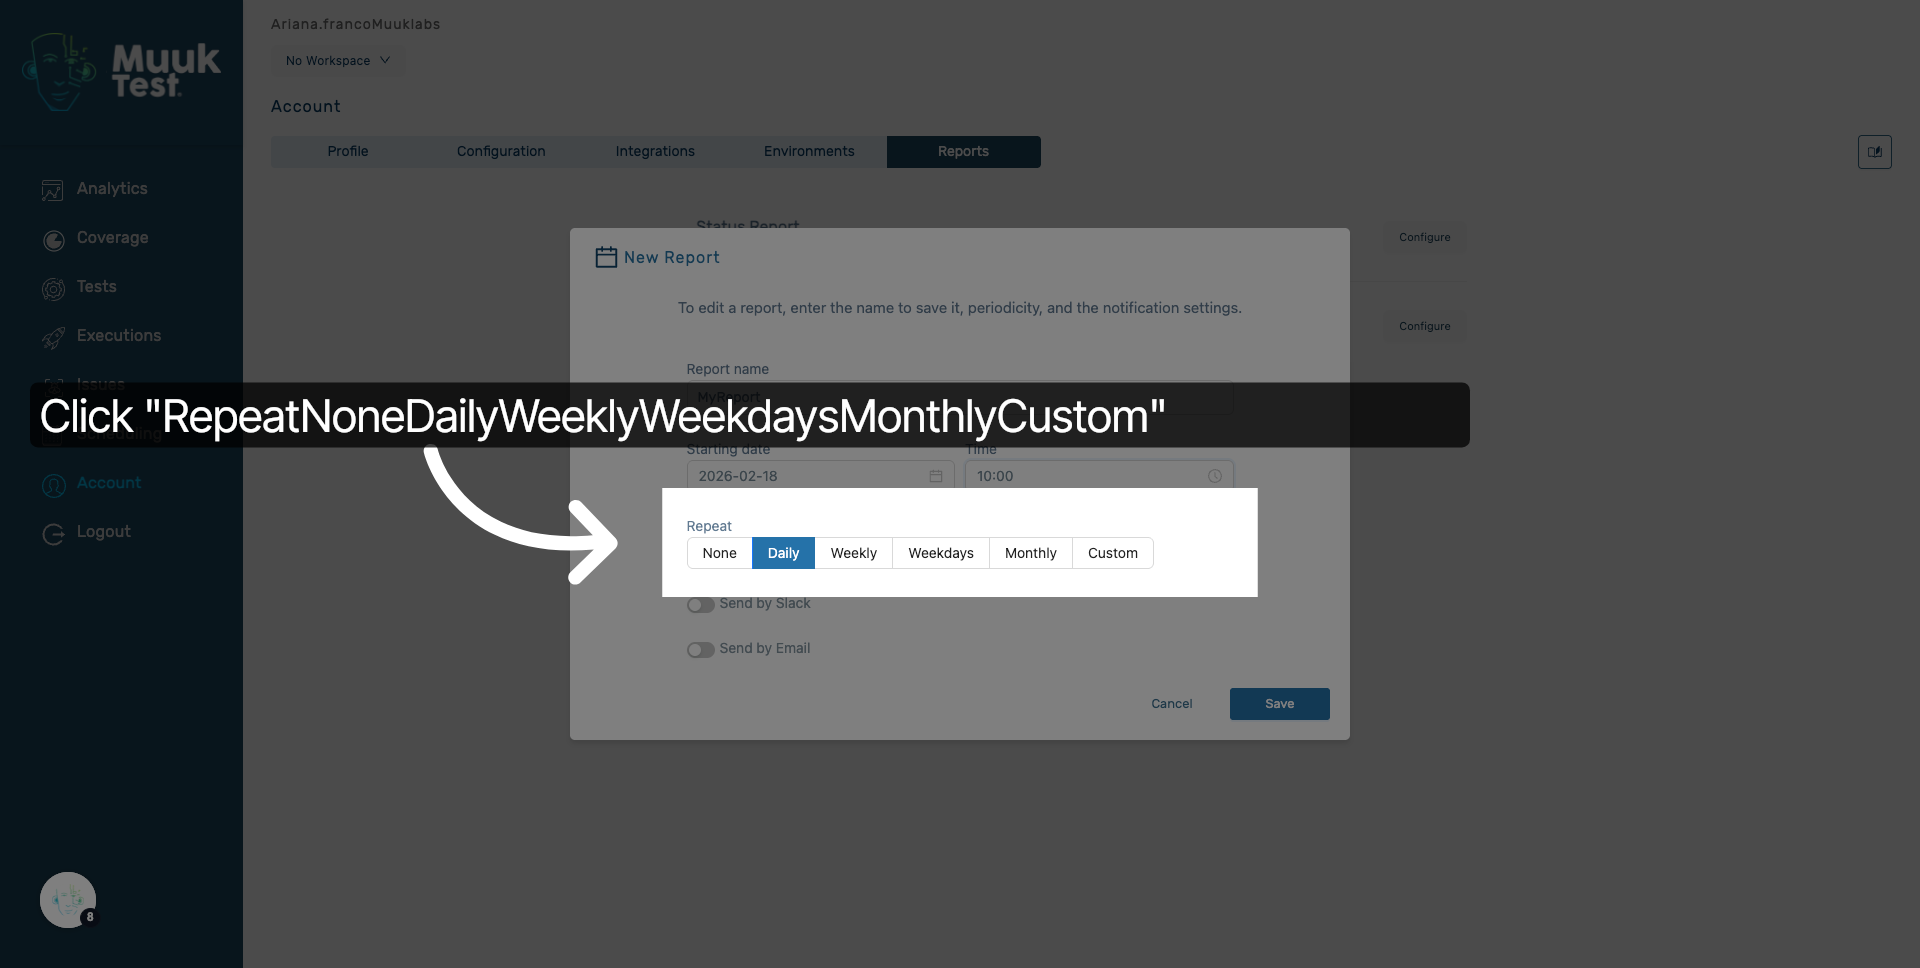
10. Open Repeat Options
Click the repeat options to configure how often the report will be generated.
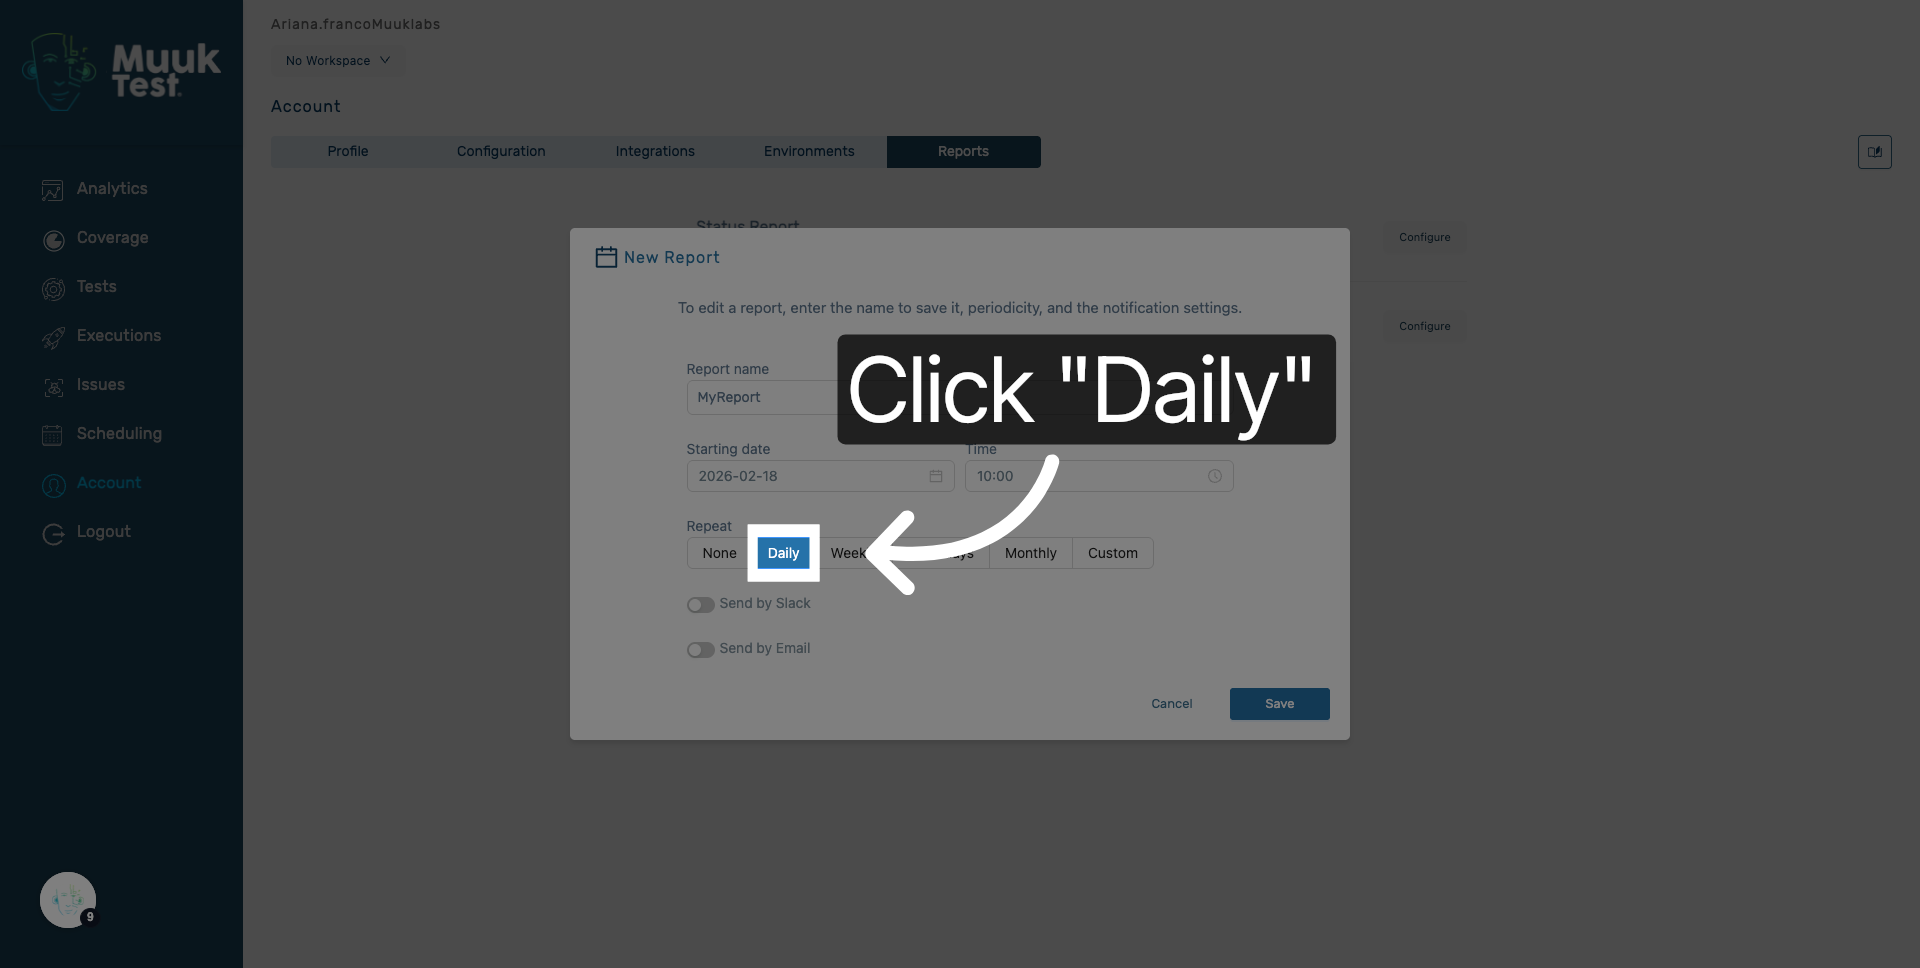
11. Select Daily Frequency
Select Daily to schedule the report to run every day.
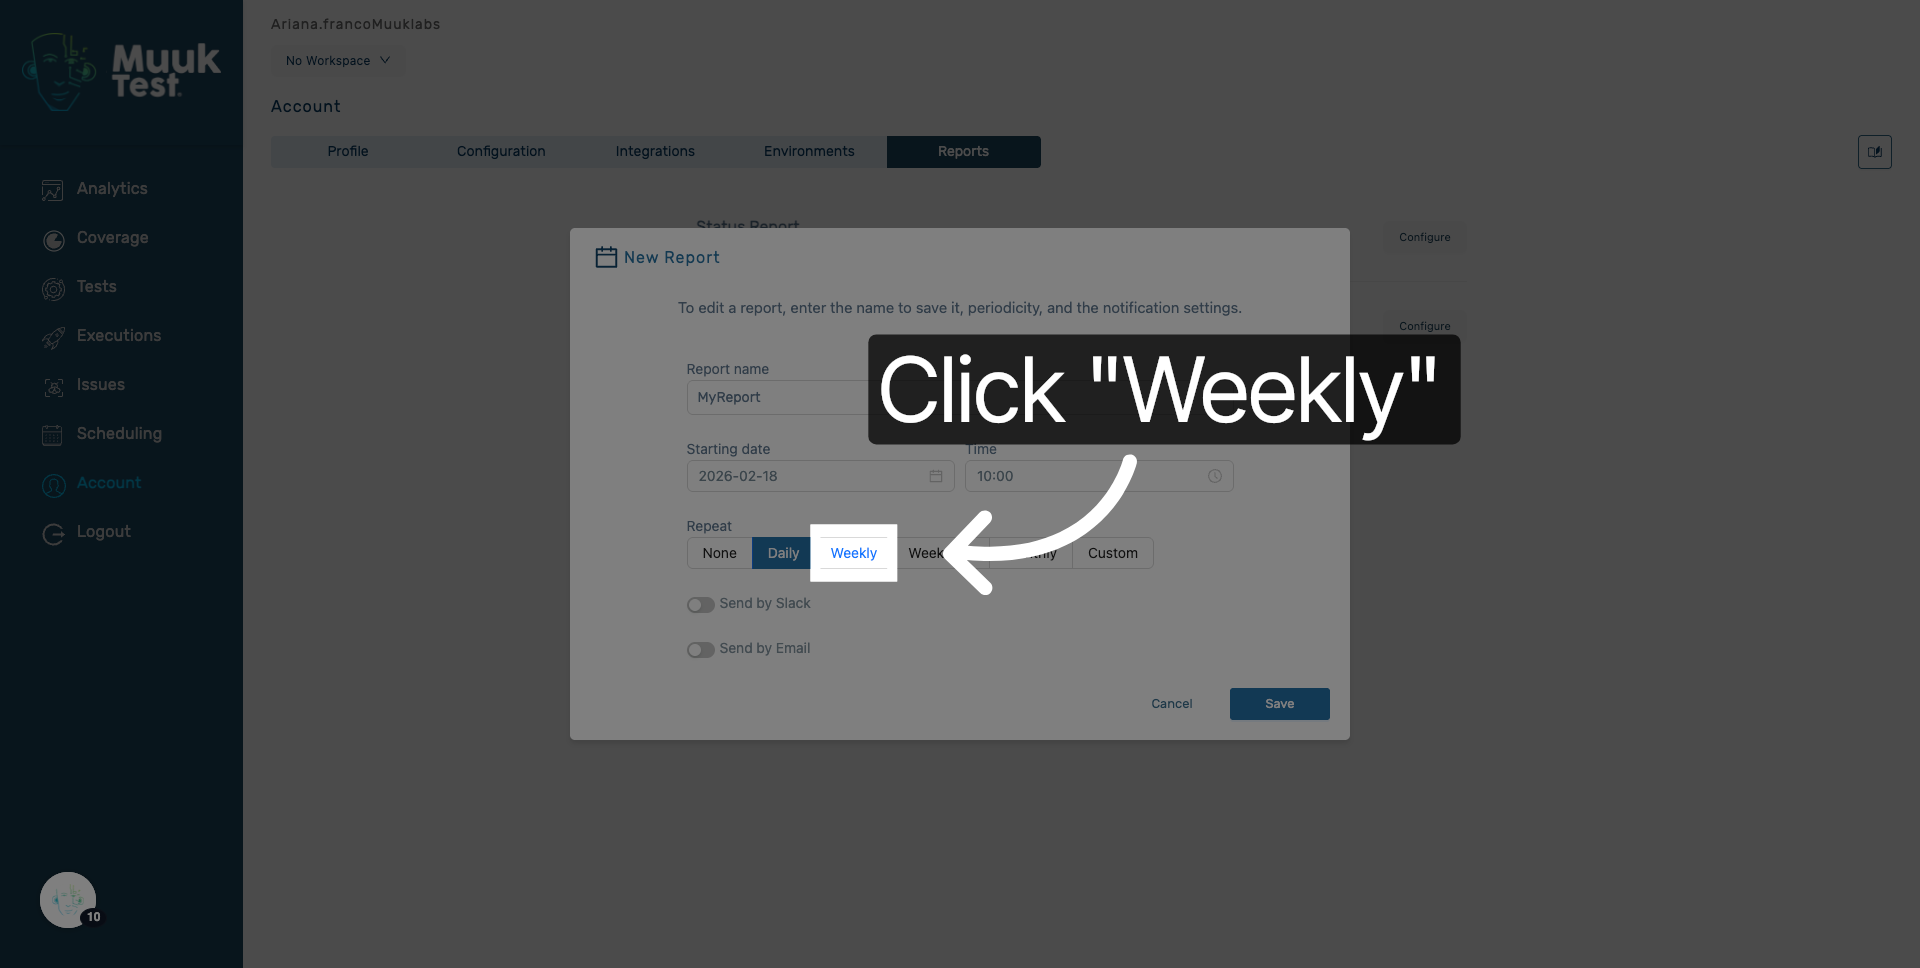
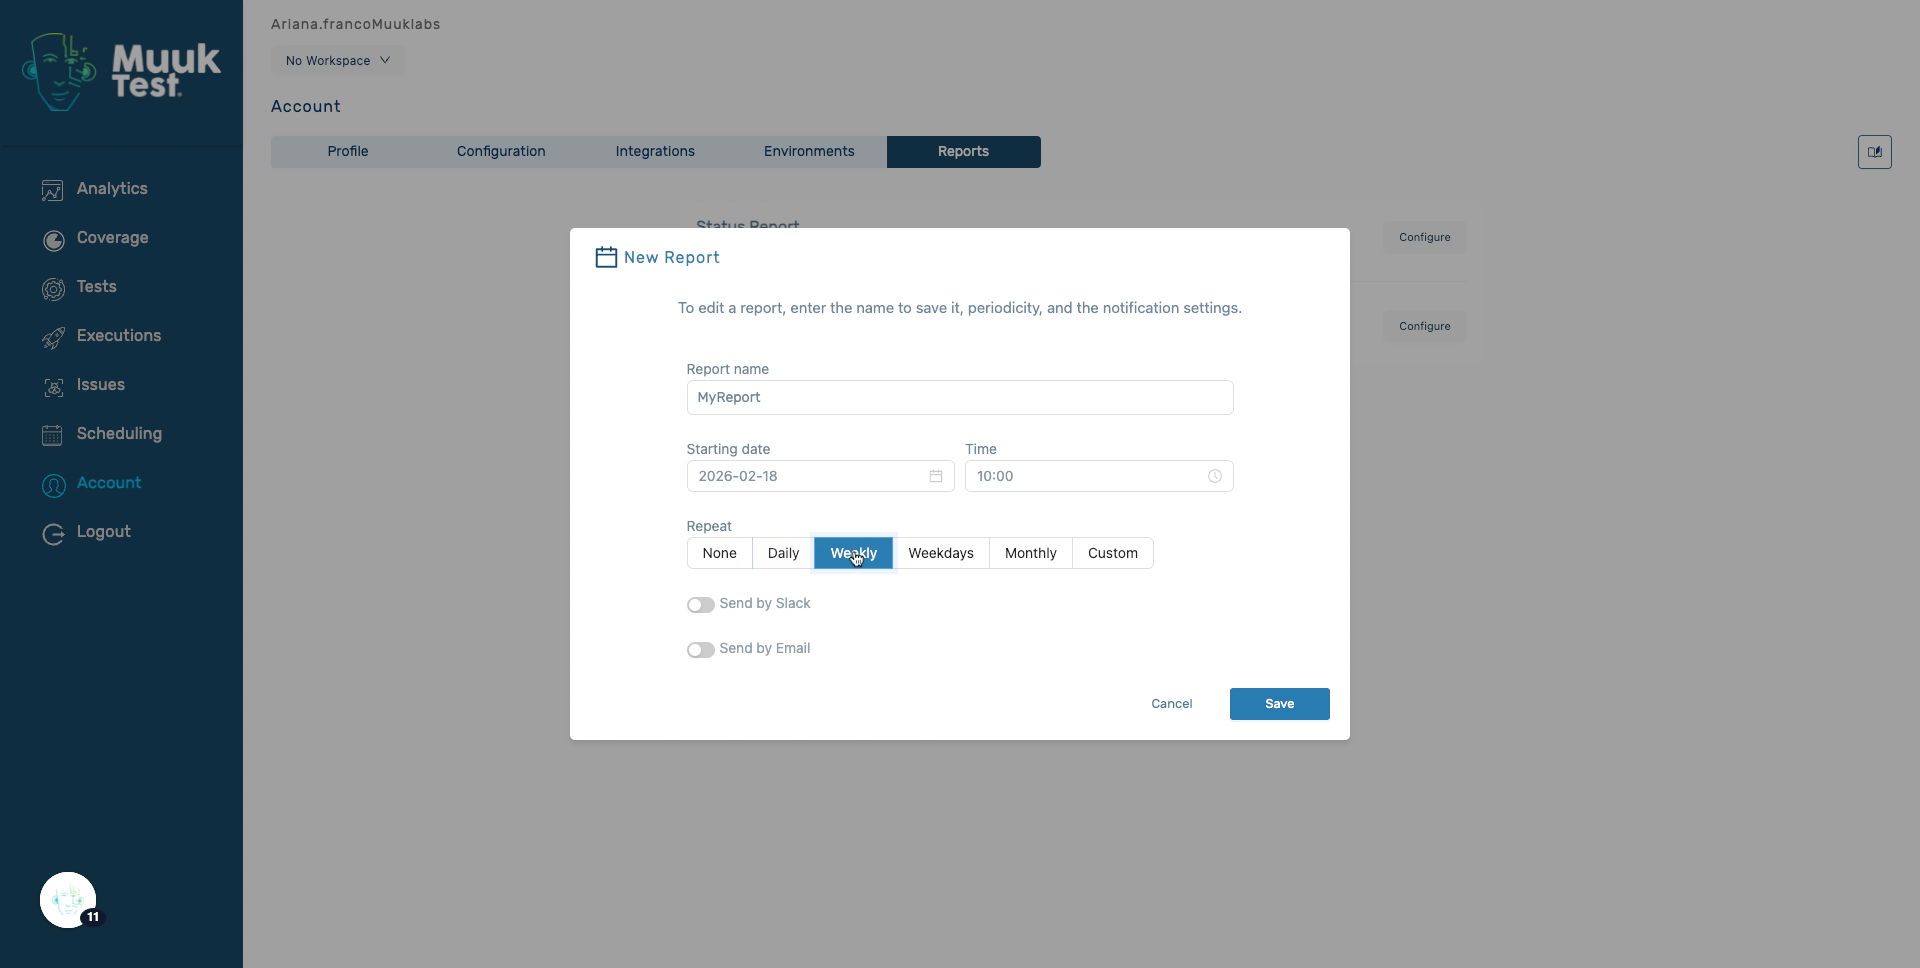
12. Select Weekly Frequency
Select Weekly to schedule the report to run once every week.
13. Enter Weekly Frequency
Enter the frequency as weekly to specify the report recurrence.
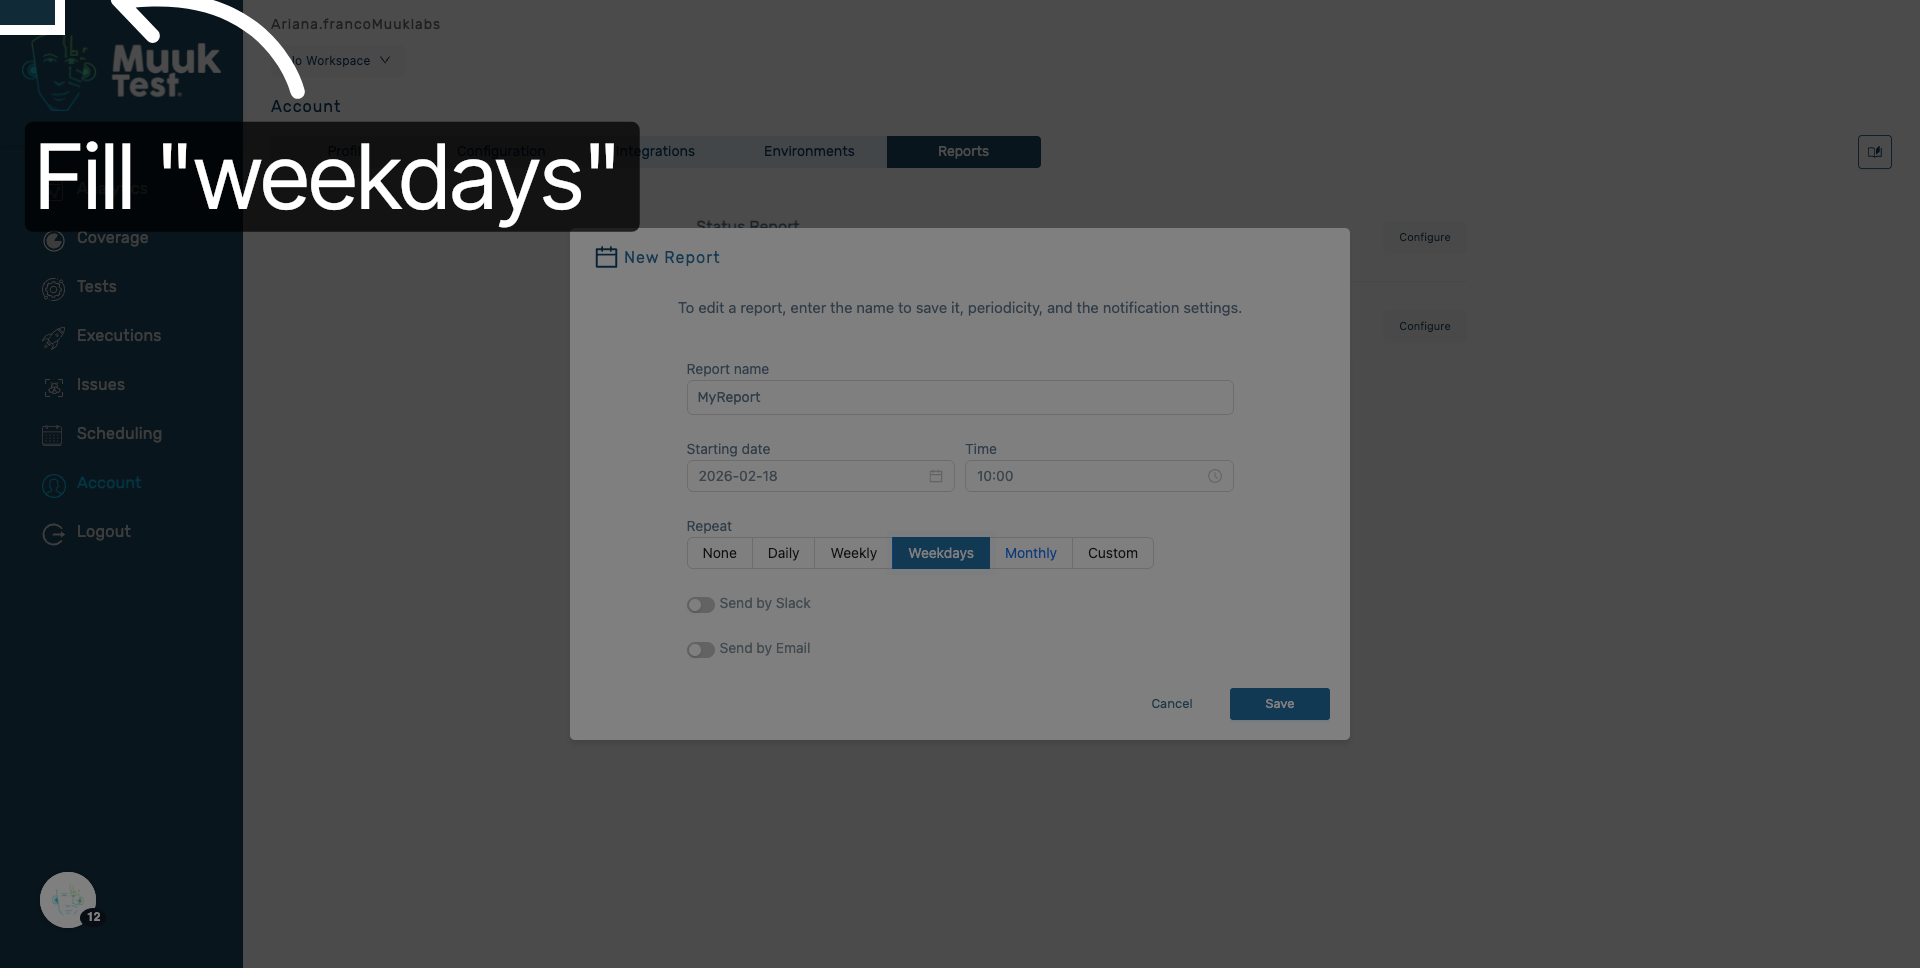
14. Specify Weekdays
Fill in weekdays to limit the report generation to business days.
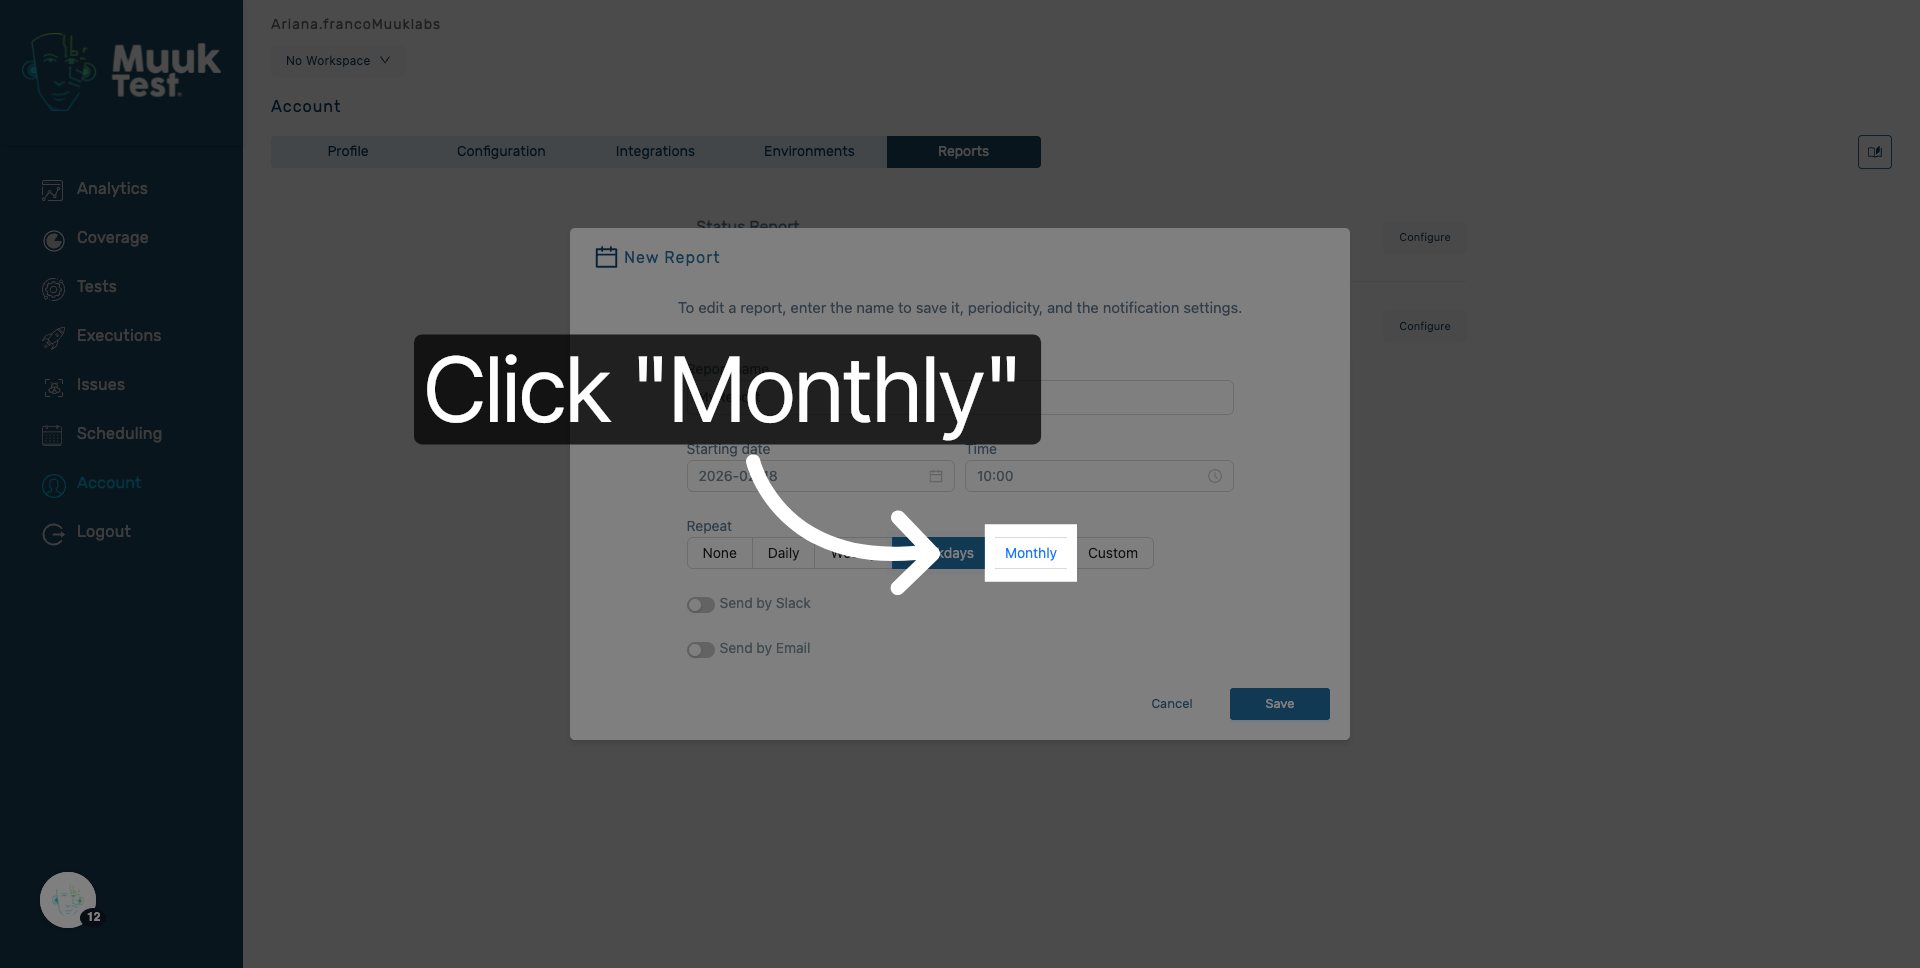
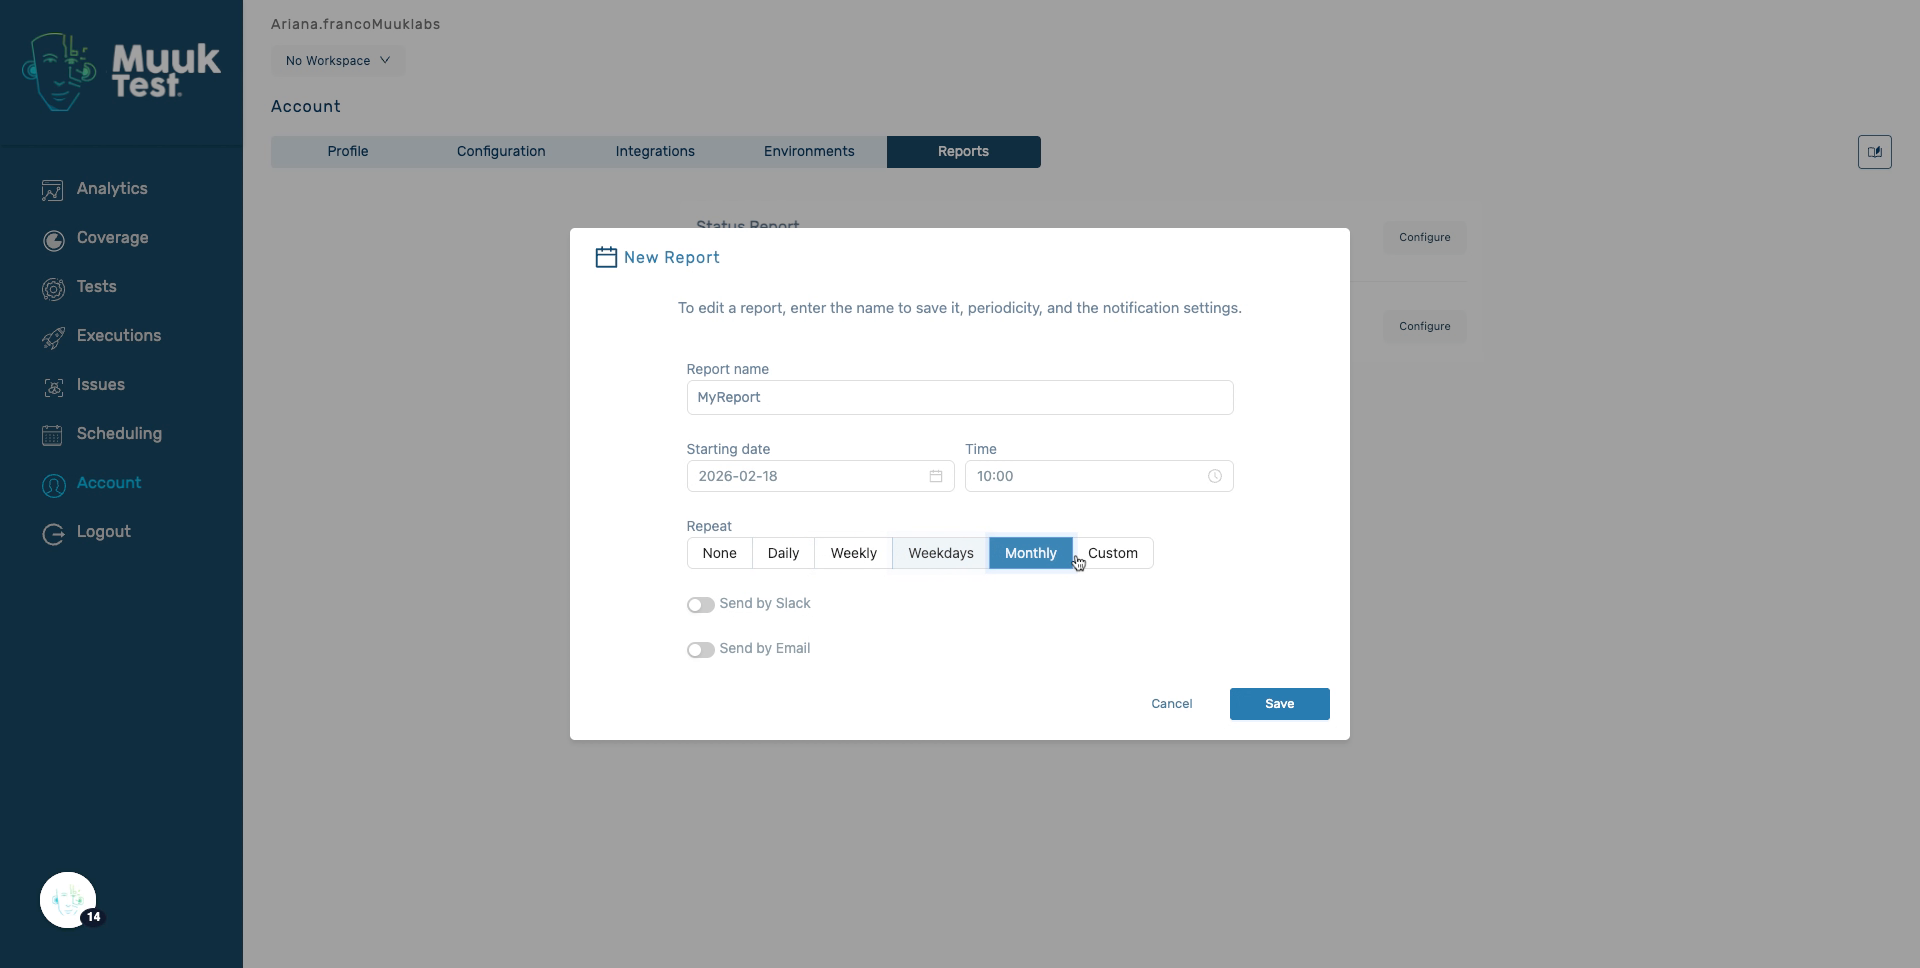
15. Select Monthly Frequency
Choose Monthly to schedule the report to run once every month.
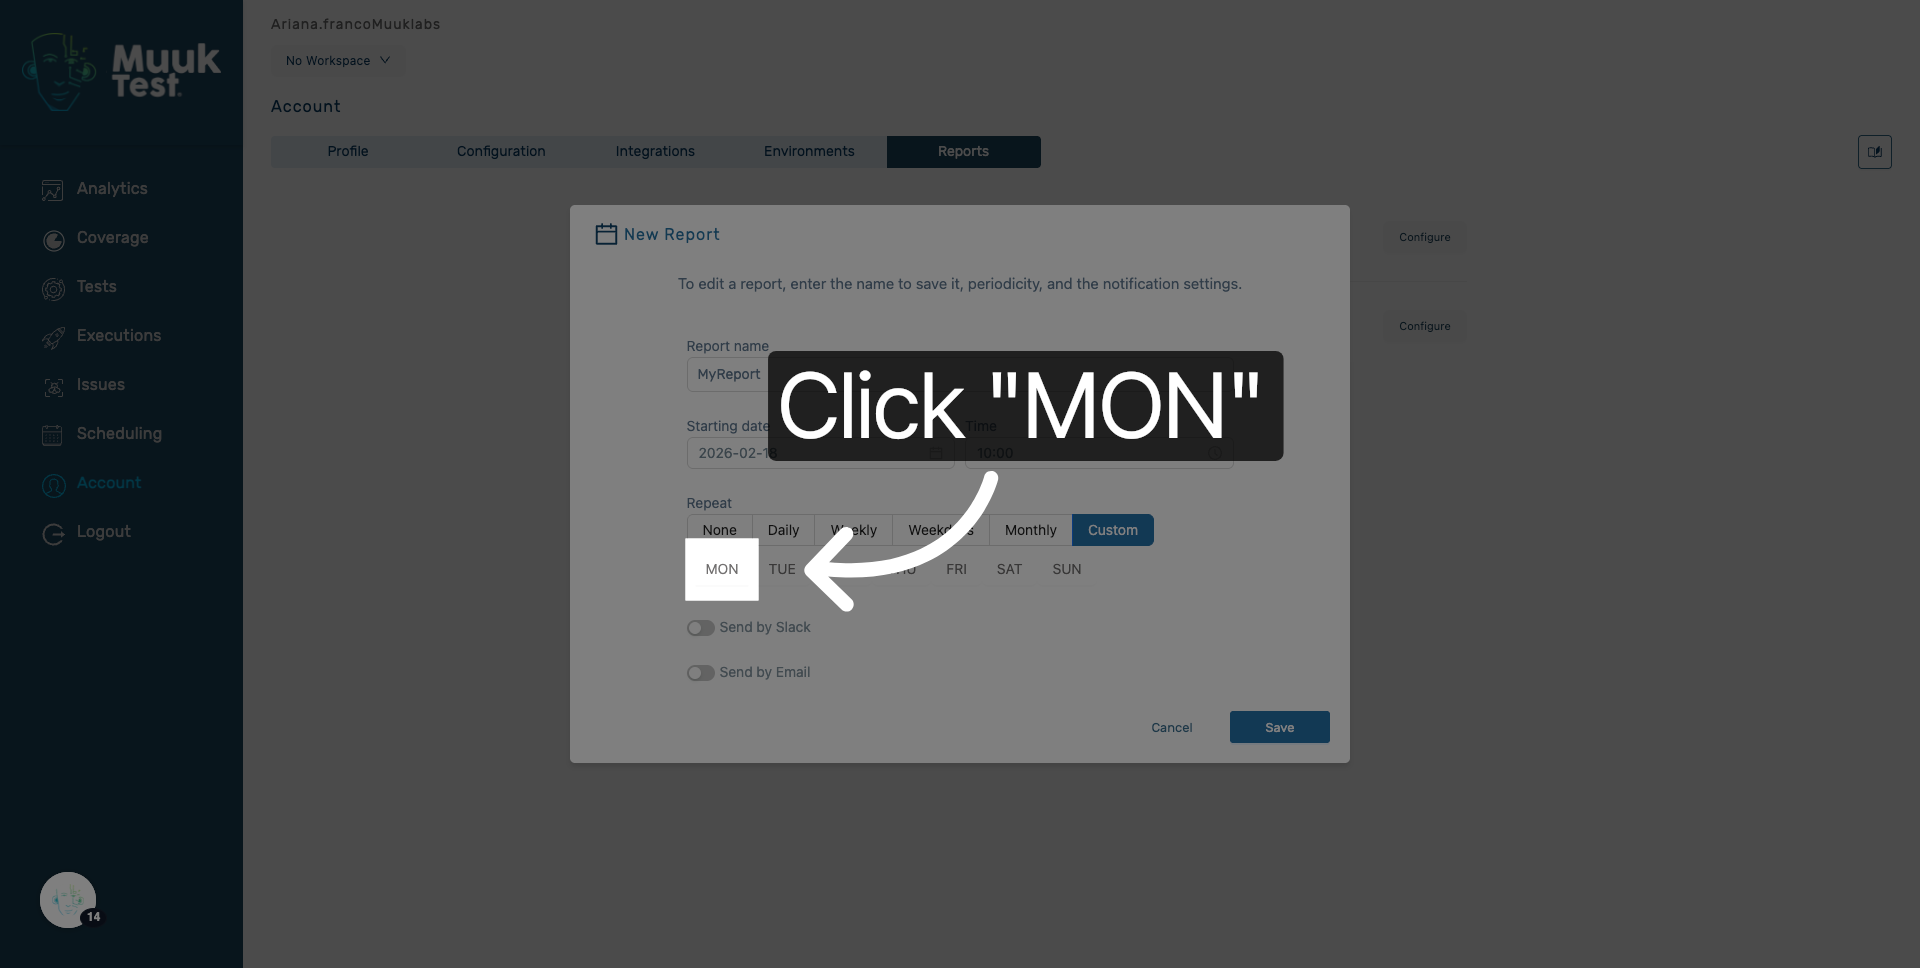
16. Enter Custom Frequency
Fill in custom to define a personalized schedule for the report.
17. Select Monday Option
Click MON to specify Monday as a day for the report to run.
18. Click Next Step
Click here to proceed to the next configuration step in the report setup.
19. Continue Configuration
Click here to continue with the report scheduling process.
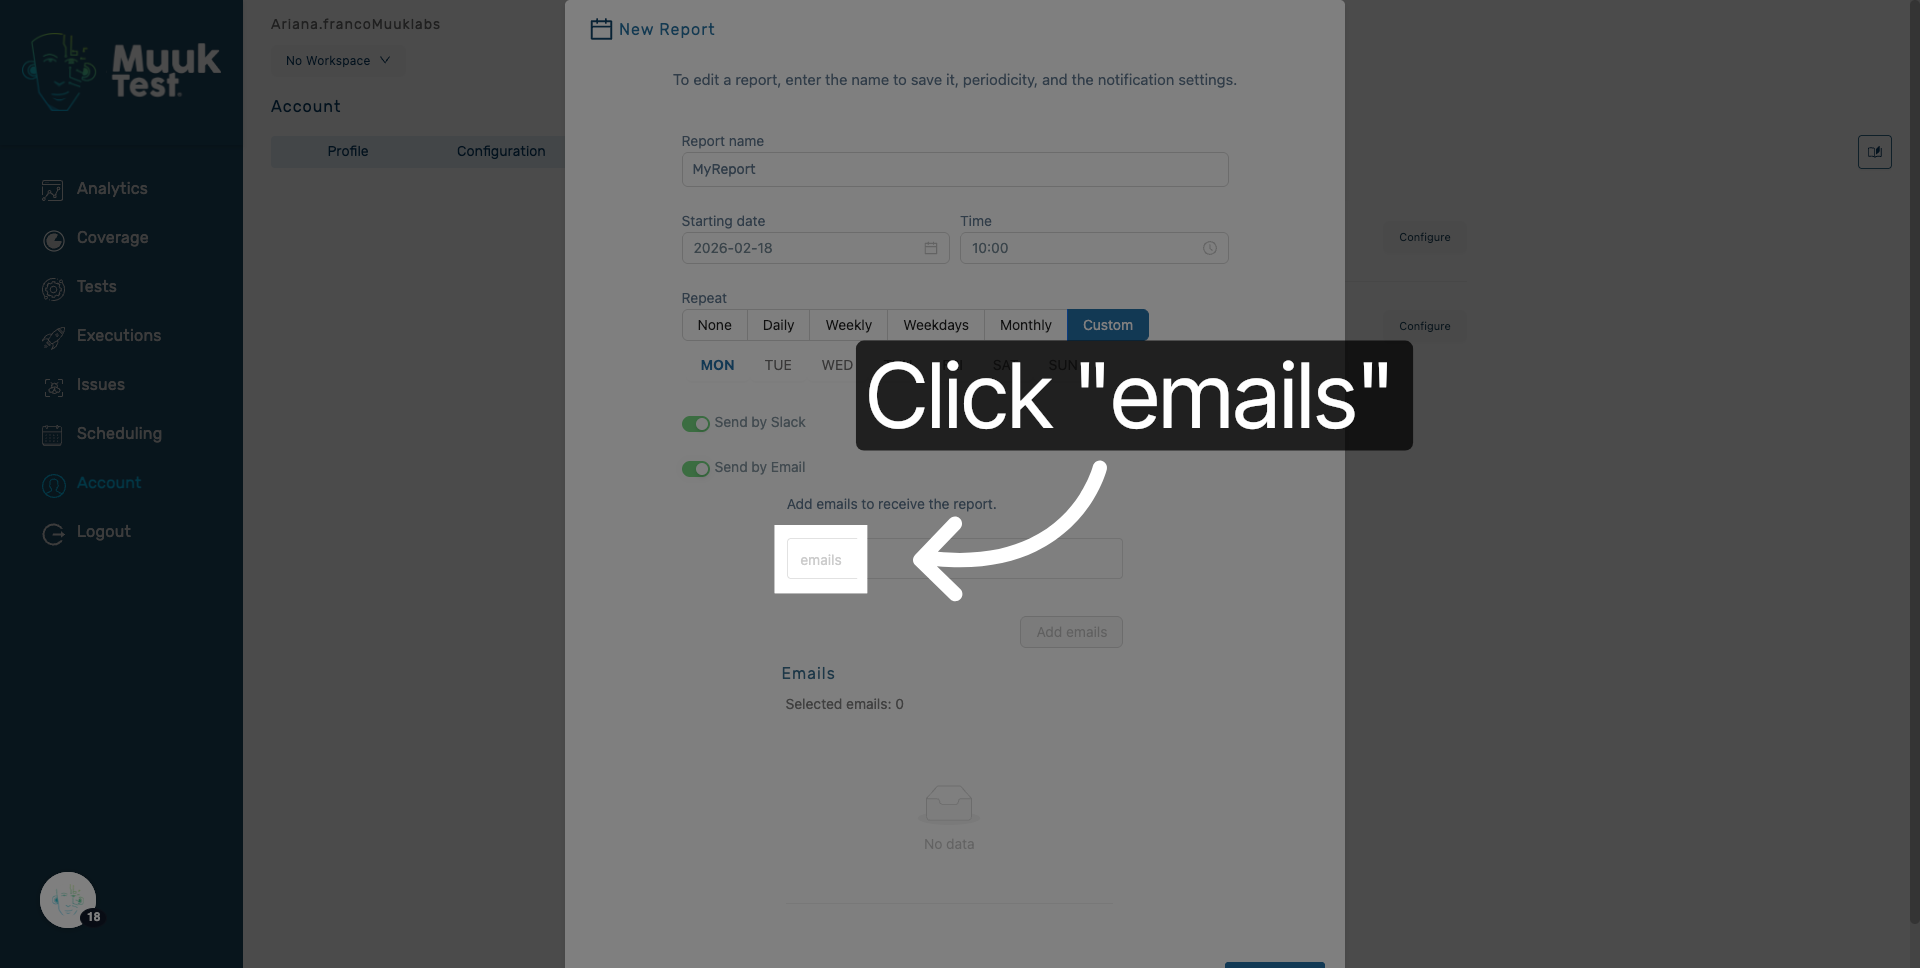
20. Open Emails Section
Click the emails section to add recipients who will receive the report.
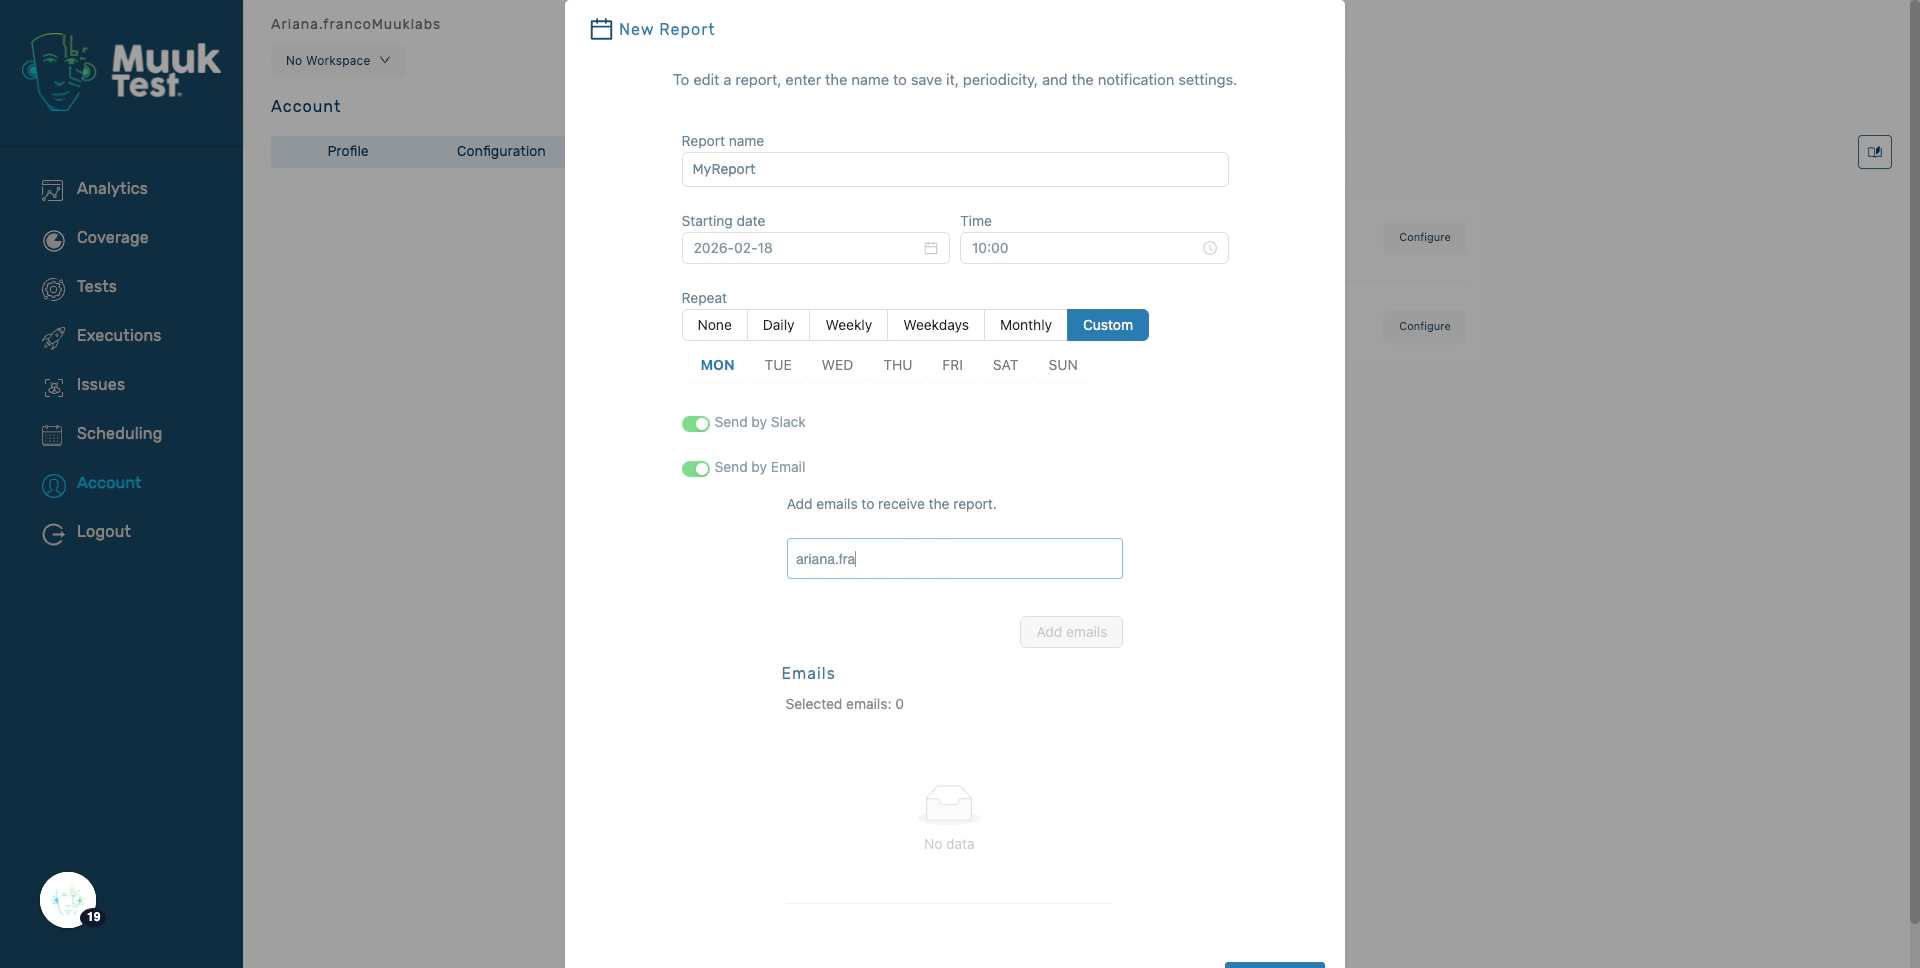
21. Enter Recipient Email
Enter the email address of the recipient to receive the account status report.
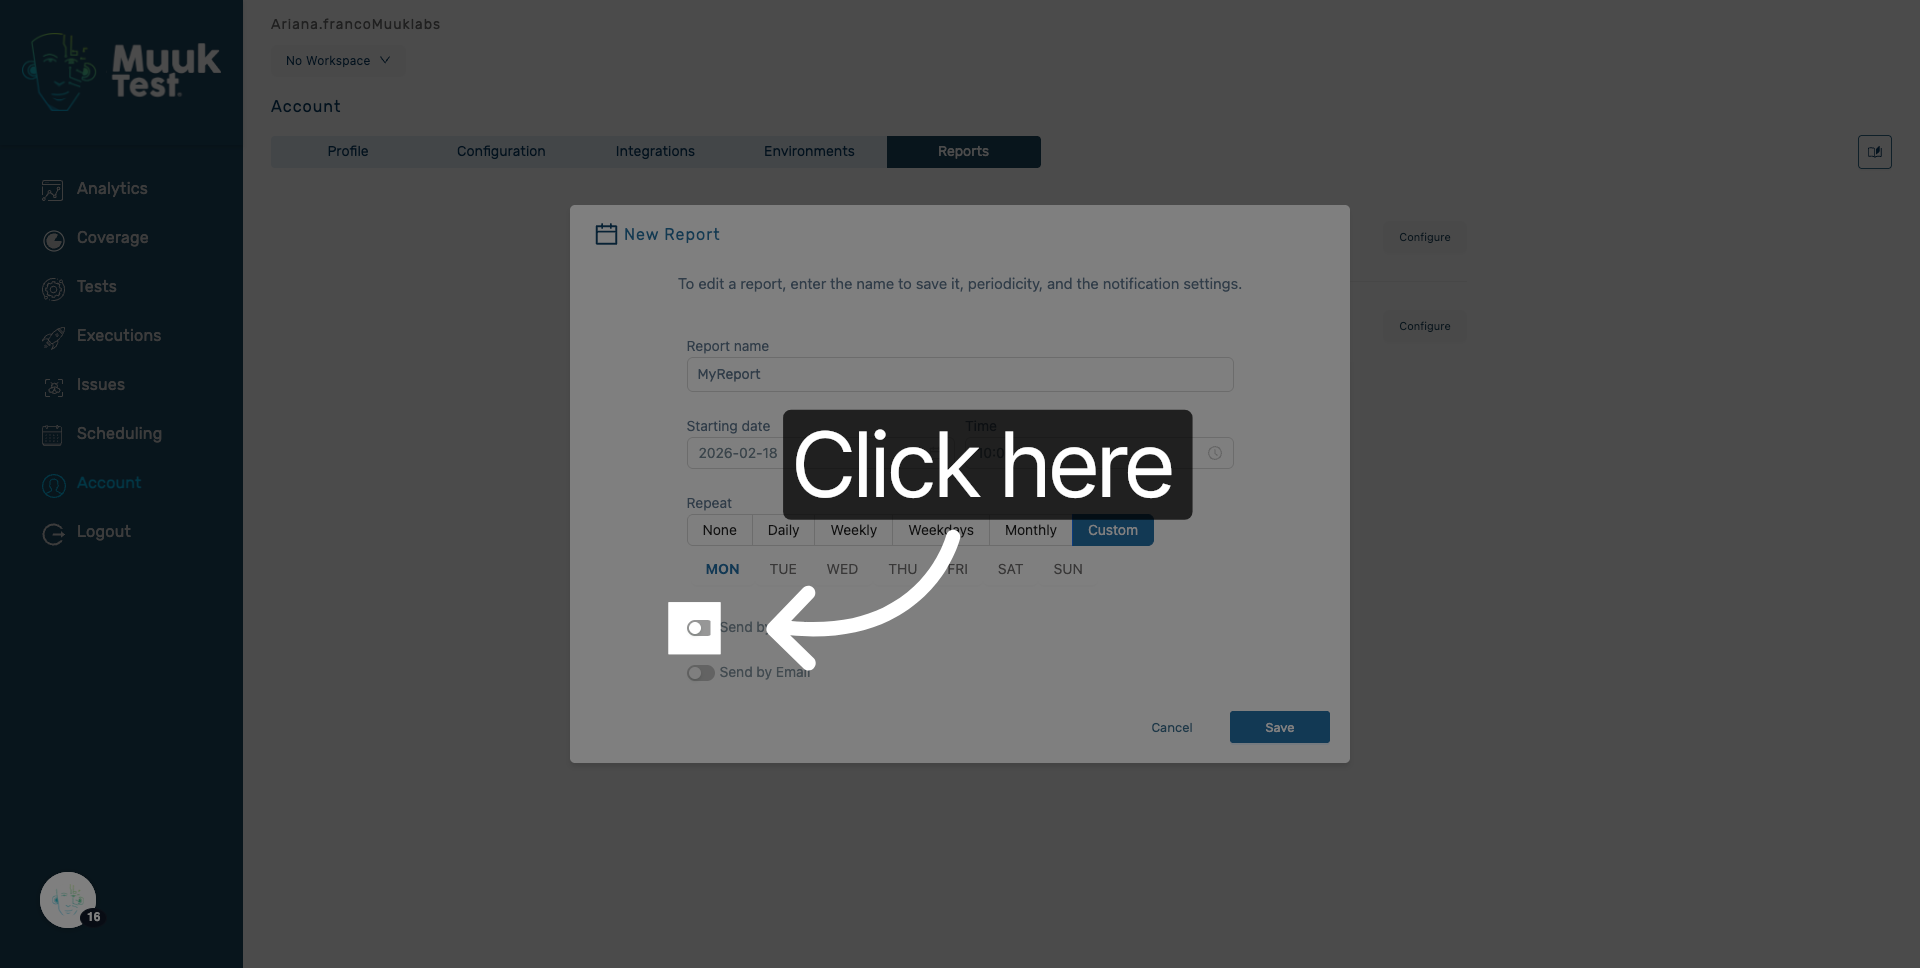
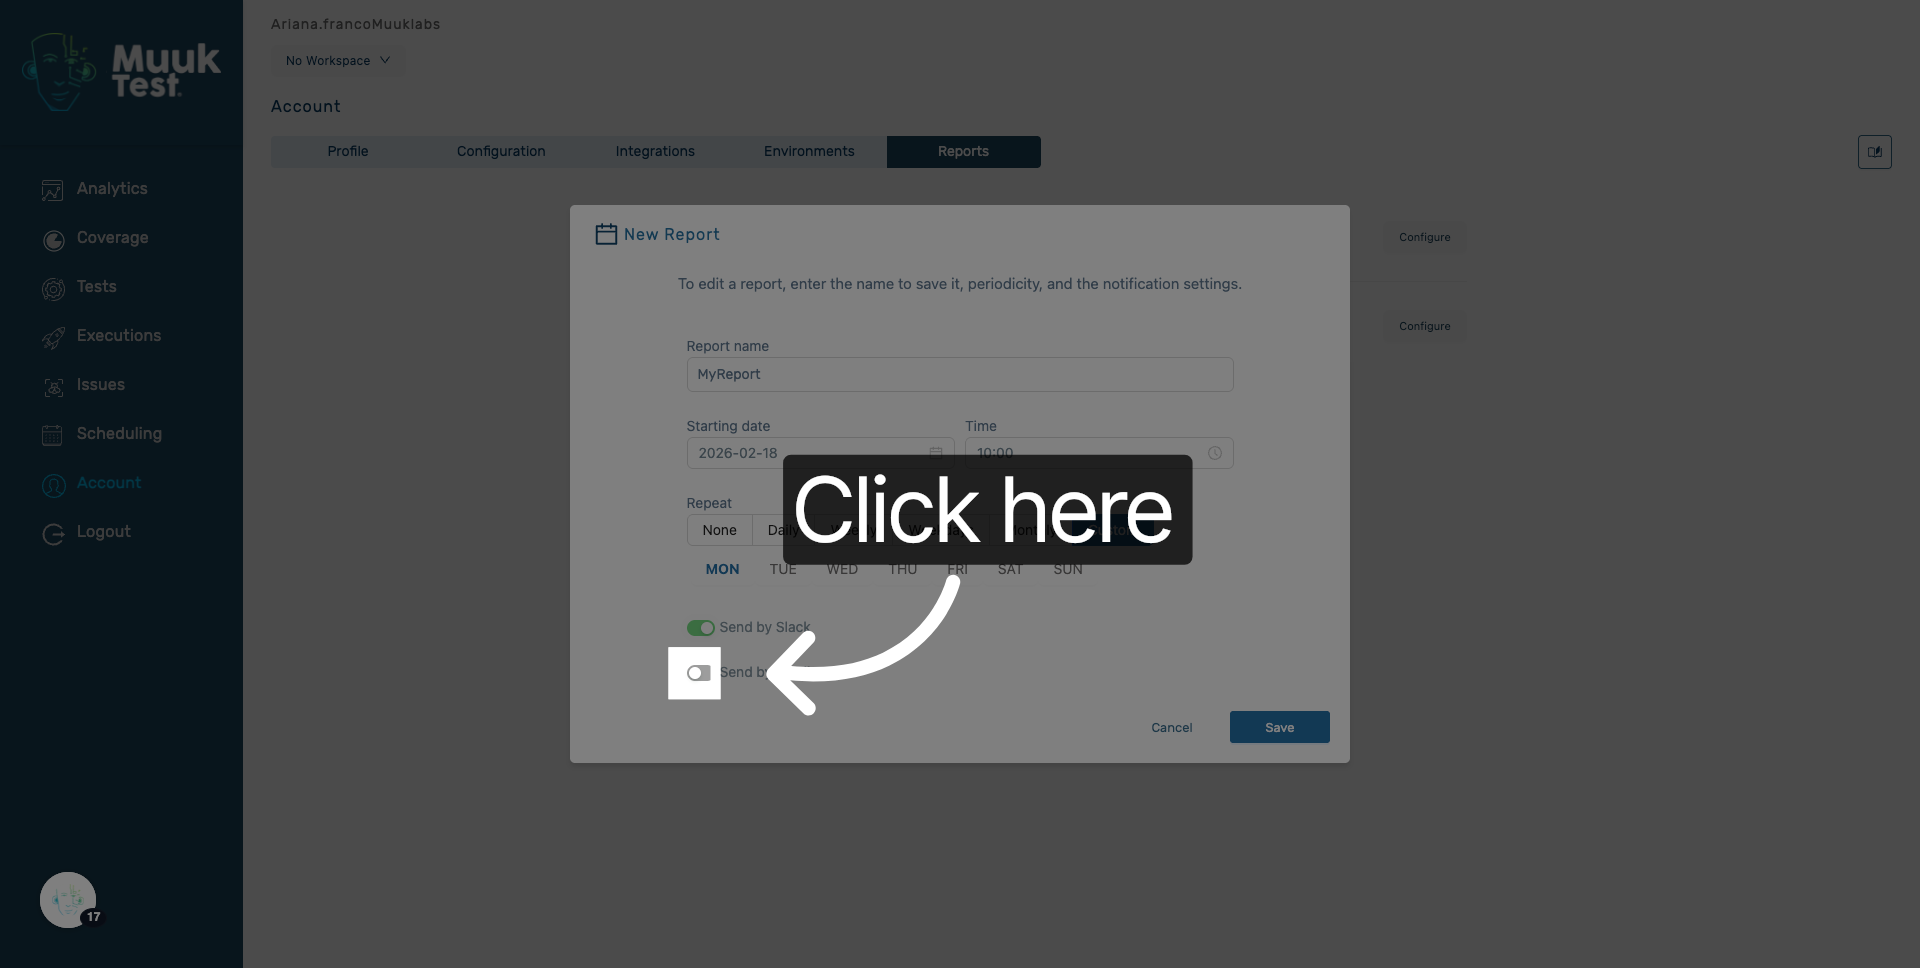
22. Select Send by Email Option
Click Send by Email to enable email delivery of the report to selected recipients.
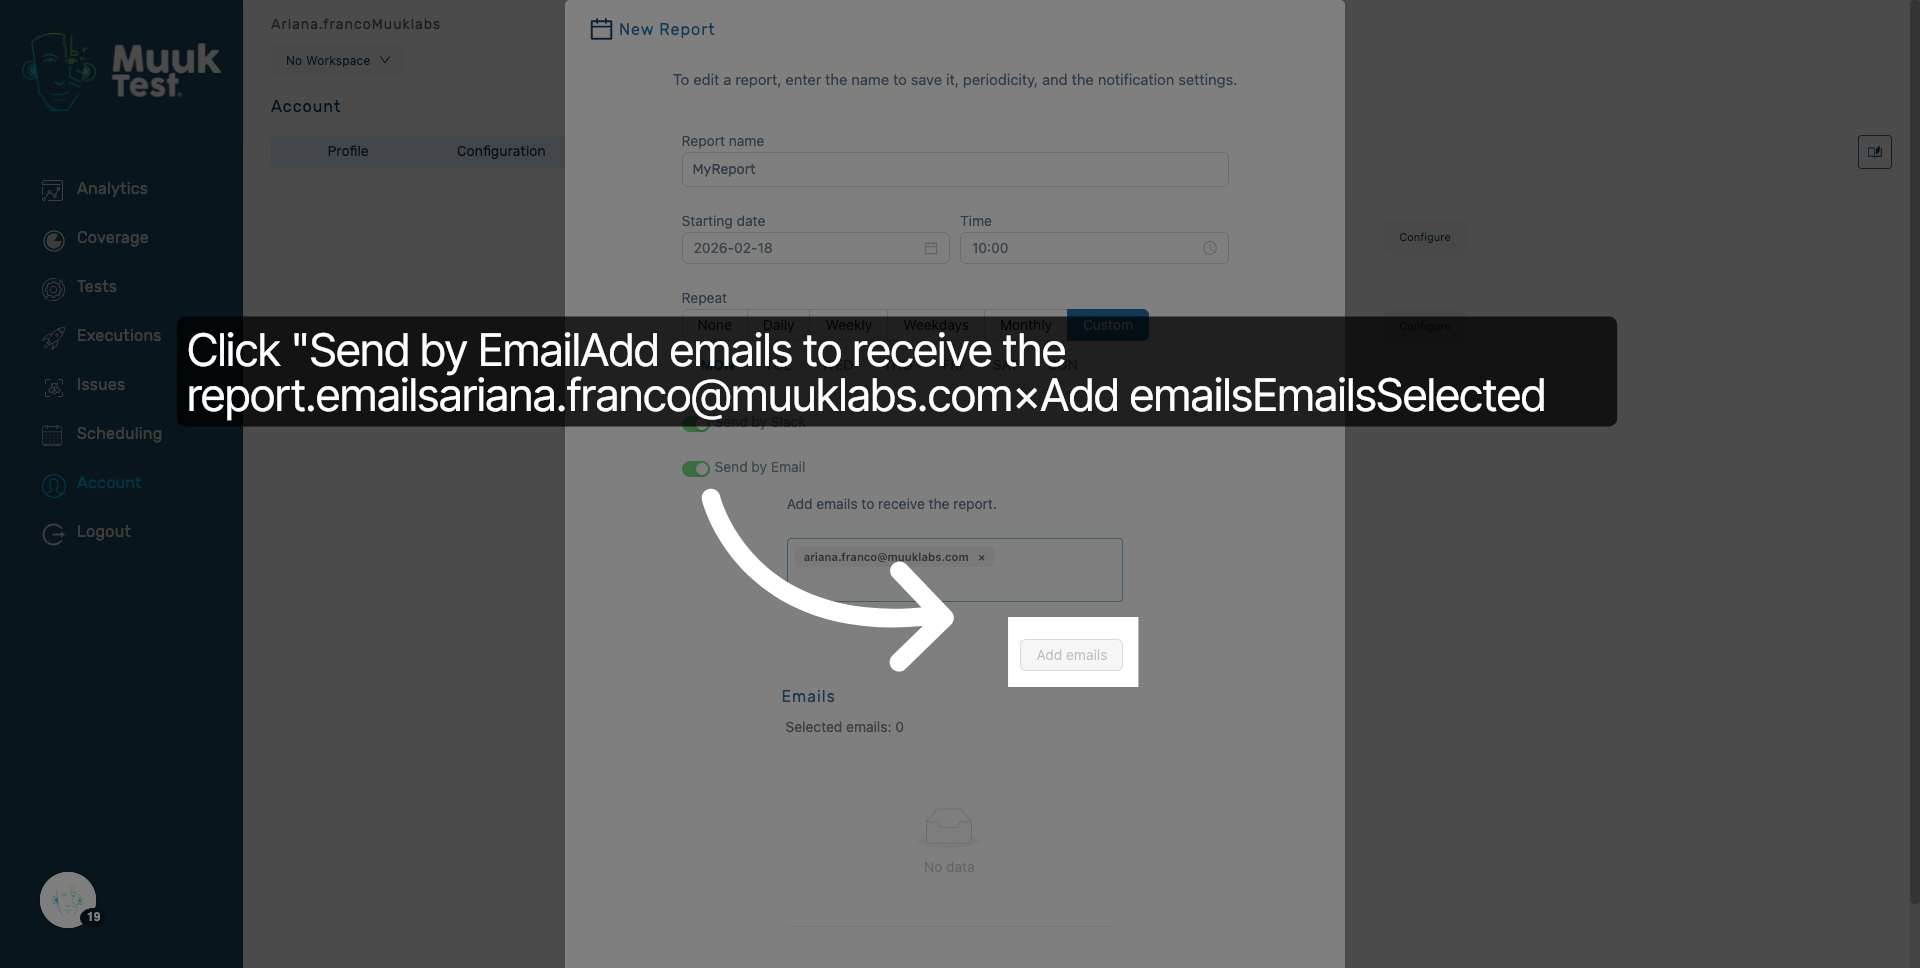
23. Add Email Recipients
Click Add emails to include the entered email addresses as report recipients.

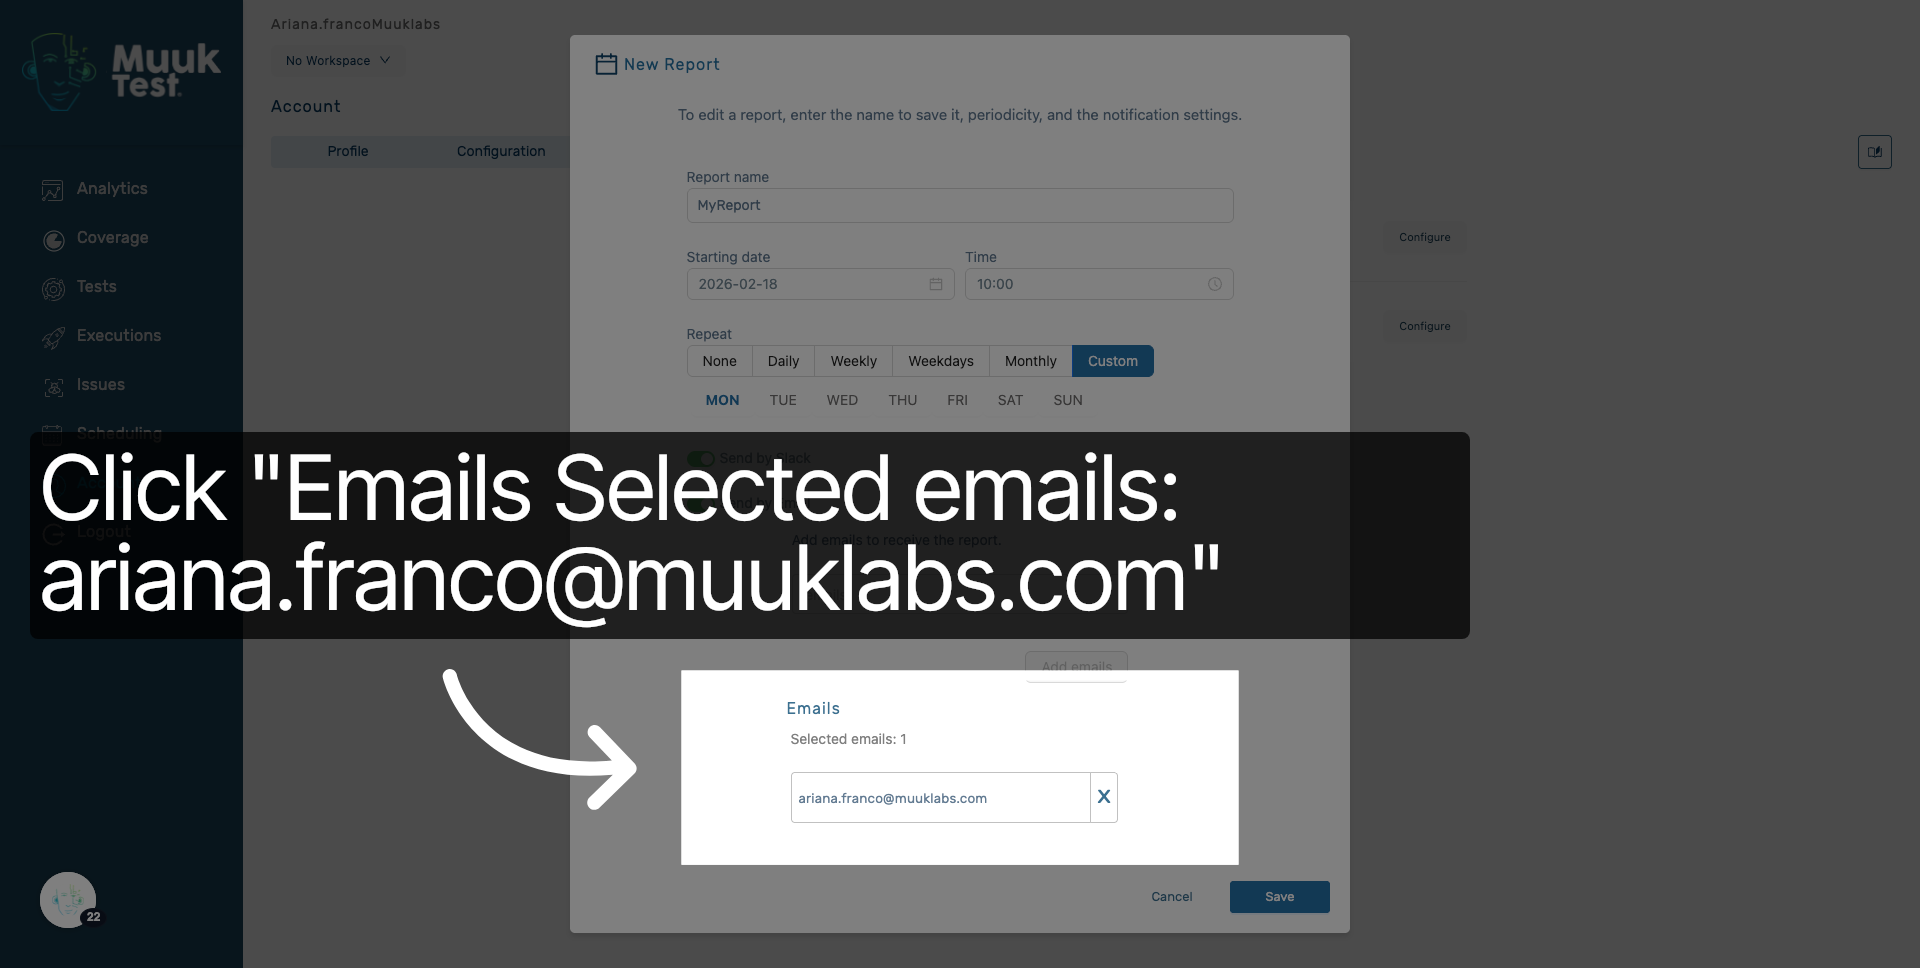
24. Review Selected Emails
Click the selected emails list to review and confirm the recipients added.
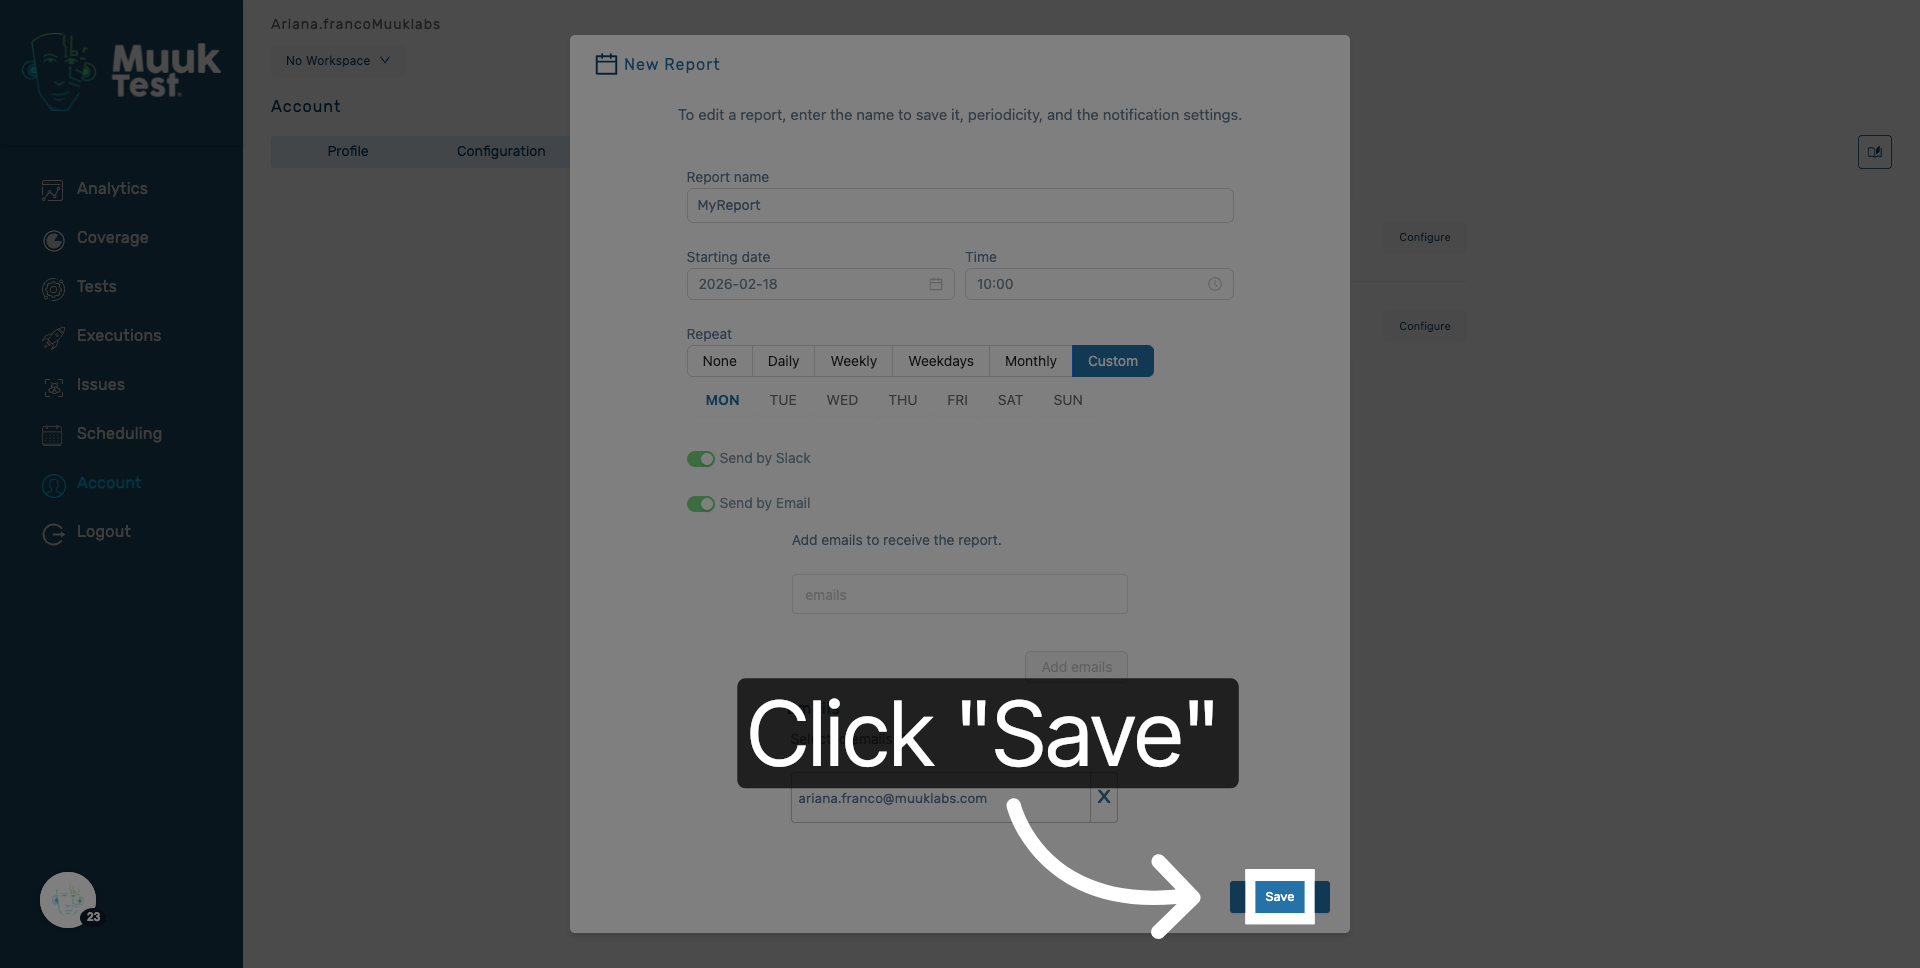
25. Save Report Settings
Click Save to apply all report configuration and scheduling settings.
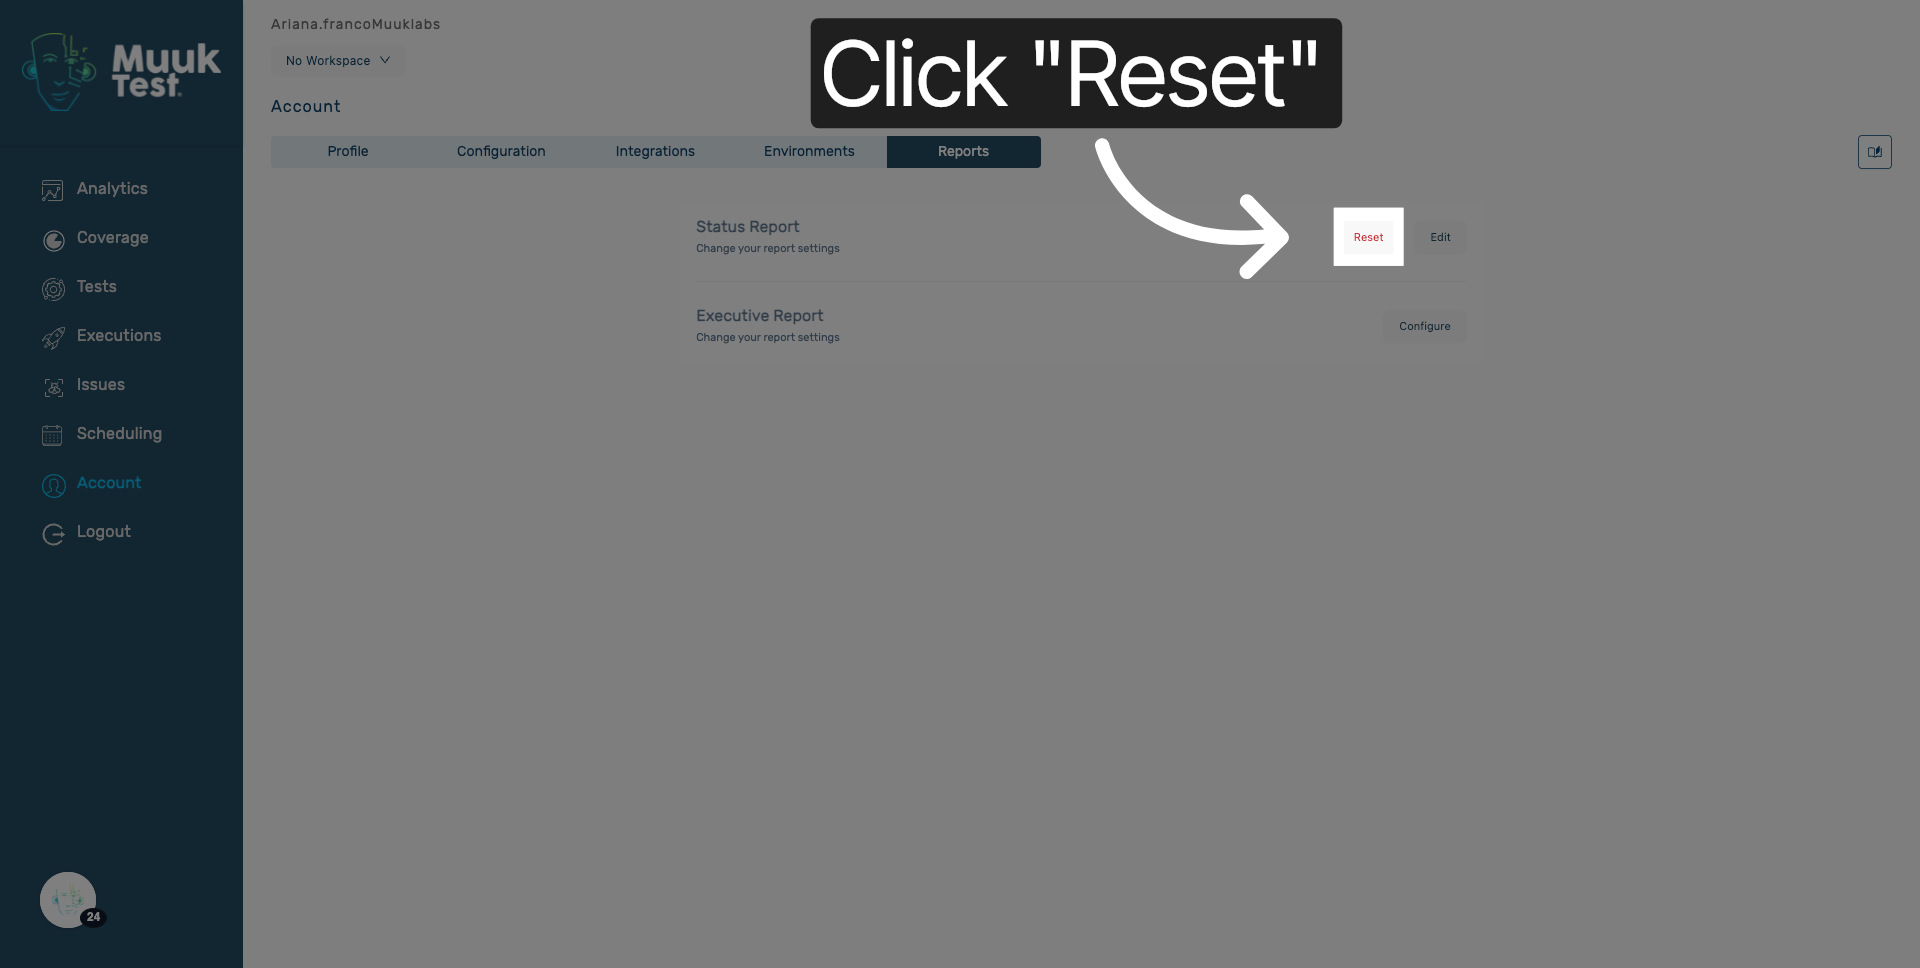
26. Reset Configuration
Click Reset to clear all current settings and start the configuration process over.
You have successfully configured and scheduled the account status report in Muuktest. The report will be generated and sent to specified recipients according to your defined schedule.
Comments
0 comments
Please sign in to leave a comment.